The content of the article
The paint hides cracks and small chips that appeared on the tile due to high humidity or mechanical damage. It masks the darkened seams and changes the appearance of the walls in the bathroom and kitchen. Paintwork is a cheap and practical material that is used to update the design, if there is no time and money for repairs. It is easy to apply and remove, if you know the basic rules and tricks.
Water or oil base
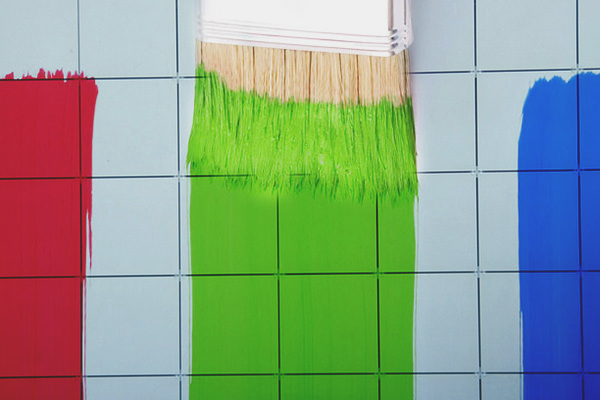
Redecorating a kitchen or bathroom begins with choosing the right paint. It is important to take into account the specifics of the premises. The tile regularly contacts to moisture, heating devices and fat. Not every paint will pass this test.
Acrylic varieties are among the most resistant options. They are bright and economical, well mask defects of the tile.Acrylic versions withstand temperature changes, do not lose color with regular contact with moisture.
Oil-based paints fit well on the glossy and matte surface of the tile. They are evenly distributed on the walls and over the years do not lose their original appearance. Oil varieties, like acrylic, are recommended to buy for beginners.
Professionals who do not have one repair behind their shoulders will like epoxy variants. Such paint coatings dry quickly, have almost no odor and are designed to work in enclosed unventilated areas, like a bath. Epoxy paints have a dense, friable structure, so before applying the composition to the walls it is recommended to practice on pieces of old ceramics, which is not a pity to throw away.
Autoenamels have a rich color. Means are usually produced in aerosol cans, which simplify the application of the composition on a ceramic surface. Tile before applying the enamel does not need to grind and primed. The coating is kept for years, not afraid of high humidity and temperature changes.
Paintwork material after applying to the wall or floor is fixed with varnish.Oil varieties do not fit, they quickly turn yellow. Preference is given to water-based options. They protect the paint from abrasion, fading and do not change the shade.
If you do not need to update all the walls, but only certain areas, it is recommended to buy compositions for glass or ceramics. Such paints are convenient to put patterns and draw landscapes on the tile. They are durable, thick and without a rich odor. The only downside is the high cost.
Cleansing and degreasing
Dirt and greasy stains cause bubbles and peeling paint. The walls in front of a small cosmetic repair must be washed. It will take:
- brush or hard sponge;
- detergent with abrasive particles or acids;
- warm water;
- rubber gloves.
Dried grease from the tile is removed with a solution of chlorine. With cold water, mix a little of the product and wait until it dissolves in the liquid. The resulting composition is applied to the walls and floor, leave for 10 minutes, and then clean off the remnants of dirt with an iron brush. Grease stains are treated with a paste of soda or spray for washing windows and mirrors.
Do not be afraid that the funds will damage the tile. Facing material will still have to grind before applying paint.
A clean tile is wiped with a soft cloth to remove residual soap and then treated with alcohol or kerosene to degrease. Suitable for these purposes and vinegar or essence.
The degreasing solution is prepared quickly and easily:
- Alcohol is diluted with water in a ratio of 1 to 2.
- Per 100 ml of kerosene take 300-400 ml of filtered liquid.
- The ratio of vinegar and water is 1 to 1.
- Part of the concentrated essence is mixed with 10 parts of water.
You can choose any recipe. In the tool moistened with a towel or napkin, carefully squeeze a cloth to make it slightly damp, and then wipe the tile twice.The solution will remove residual detergent and grease, prepare the tile for the application of primer and paintwork.
Work with kerosene, chlorine and acetic essence only in rubber gloves. Wear a respirator to prevent toxic fumes from entering the respiratory tract. The room after water procedures and degreasing need to be aired, and then you can begin to sand the walls.
Foundation preparation
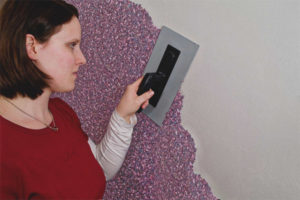
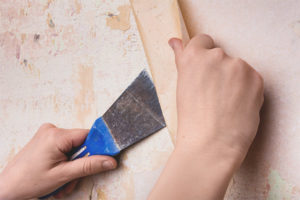
The tile is sanded before full staining to ensure perfect adhesion of a glossy or matte coated surface. Emery paper, which is attached to a wooden roller or a spatula blade, will do. Such a device is convenient to handle even corners and joints, as well as other hard-to-reach areas. Emery paper is replaced with a sanding net. The main thing is that the tool had small abrasive particles. Large damage the tile, leaving noticeable scratches that can not even hide the paint. And you just need to carefully remove the top layer of tile.
After sanding, a primer is applied to the walls in the bathroom and kitchen. Suitable tool designed for surfaces that do not absorb water.Ceresit CN 94 and Betocontakt Knauf are distinguished. Such compositions provide adhesion paint with smooth and dense surfaces.
Important: In the correct primer designed for tiles, there should be no quartz sand.
The composition is applied to the cladding material in a thin layer and wait until it dries completely. The exact time is indicated on the packaging.
Primer with increased adhesion is designed for oil, water emulsion and acrylic paints. Under the coating containing resin, put the composition for epoxy paints and varnishes.
Coloring
The kitchen and the bathroom before the repair work is freed from unnecessary furniture. If walls are to be painted, then windows, window sills and the floor are covered with plastic wrap. Skirtings are stuck with masking tape so as not to scrub them from sticking splashes. Film or newspapers cover furniture that could not be removed from the rooms.
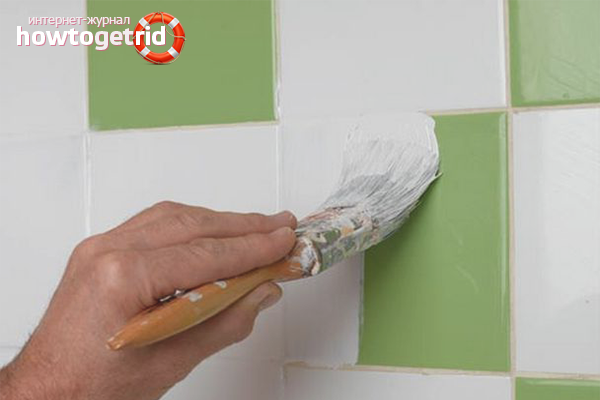
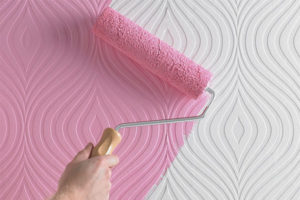
The emulsion is poured into a plastic tray and diluted with water, if indicated in the instructions. Prepare a small portion of paint, which is enough to handle the entire room or 2-3 walls. When fully painted using foam rollers.Tools made from rigid materials are recommended to be discarded.
The roller allows you to capture large sections of the wall. Brushes are used if you want to apply paint to hard-to-reach areas. Choose species with soft and not very long bristles. Tassels are useful when applying patterns or drawings.
You will not need a roller if auto enamel is chosen instead of acrylic and oil emulsions. But when spraying the coating is important to maintain the correct distance. If you get too close to the wall, ugly drips form on the surface of the tile, which are very difficult to shade. When spraying the coating from a distance, the paint gets a strange dull shade that does not look very aesthetically pleasing.
Walls and seams are treated with paintwork material and left to dry for 12-14 hours. The next day, the tiles are re-painted. It will take at least 2 layers of emulsion to hide the old tile color and patterns.
The tile can not be dried with a building or regular hairdryer. Hot air leads to the formation of bubbles and peeling paintwork material. Tools sprayed on the painted surface of small particles of dirt, because of which there are stains and stains, spoiling the appearance of the kitchen.
They try not to use the rooms where the tile is updated. The grease stains that remained on the freshly painted surface after cooking dinner are very difficult to clean. It is easier to remove the wet emulsion and re-apply.
Home decor
You can update the design of the bathroom and kitchen in several ways:
- paint on the painted tile;
- apply with stencils patterns;
- use 2 or 3 emulsions of contrasting shades.
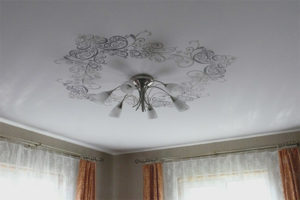
Stencils of flowers, animals and buildings can be found on the Internet. Liked pictures are printed on plain paper, cut out the holes in the right places and apply to the wall. A brush is carried out on the whole sheet, trying not to crawl over the edges. Carefully remove the stencil and wait until the picture dries. Walls that are planning to decorate with patterns are painted with white or pastel emulsion, so that the design clearly stands out against a neutral background.
Contrast tiles never go out of style.To decorate the room in this way, you need to cover the walls of the bathroom or kitchen with two layers of paint. After the emulsion has dried, selected areas are stuck with masking tape to form diamonds, triangles or other shapes. Using a thin brush, they paint over. After 12 hours, the tape is removed.
The amateur who saw the roller for the first time and found out about its purpose can also paint a tile. The main thing is to thoroughly wash and sand the walls, degrease and apply a high-quality emulsion. And after the paint has dried, fix the result with a clear lacquer that will protect the walls from fading.
Video: how to paint a tile


To send