The content of the article
Probably there is no such person who would never see drywall. Therefore, when choosing a material for finishing decorating walls, it is often the wallpaper that is chosen. Why? Drywall perfectly smooth, know only glue smear, and smooth the canvas.
And as everything dries, admire the translucent green shade of paper, the joints of sheets and seams. A little later, you can see gradually protruding rust from screws and dark spots from the encroachment of the fungus. In the words of one movie hero - lepot!
How to glue wallpaper on drywall, so that later not to redo the repair from scratch? Now we learn all the details of the process.
Drywall preparation
The longest and most tiresome stage of all work is preparation. Most of the time is spent on drying all layers of coatings than on sticking wallpaper. But, neglecting this moment, then you will have to spend twice as much time on remaking the repair, plus the cash costs of buying new materials. It is better to insure and carry out training with high quality. And a lot of nerves will be saved.
To perform all the work will need:
- Putty. Sold ready mix or powder for cooking yourself.
- A pair of spatulas. Wide and narrow.
- The reinforcing tape.
- Sandpaper.
- Acrylic primer deep penetration.
- Wide brush, short pile roller or sprayer with a wide nozzle.
- Personal protective equipment. Goggles, gloves, respirator.
The list is impressive, but it is a necessary minimum. Materials need to acquire so much that enough for puttying the entire surface and still left in reserve. In the process of repair, some more trifles will be needed, but they are in every home; you don’t have to buy them on purpose. For example, a knife or rag.
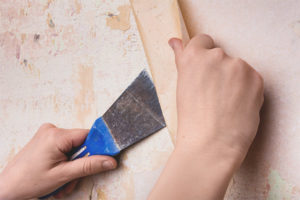
The order of work. First you need to check all the mounting points of drywall to guide profiles. Screws should be slightly recessed inside. If they are flush, you need to gently tighten them up a little. Otherwise, the masking putty will lay down a mound, and the trowel in work will cling to the head.
Now you need to plasterboard plasterboard. Wonderfully copes with the task wide brush or roller. The corners and joints will have to handle a small brush.By the way, if you stocked up with a spray nozzle with a wide nozzle, then this stage will pass quickly, efficiently and without problems. Only be sure to shake the container periodically to avoid splitting of the primer. And try not to pshikat in one place several times. Do you need drips on the floor?
After the primer has dried, you will need a reinforcement tape. Some sources write that it looks like a bandage and adheres very well to the surface, as it has its own adhesive layer. Bullshit! The tape looks like a rare mesh and does not stick at all without help. You can stick it on the PVA, but the professionals do much easier.
At the joint or seam with a spatula put a layer of putty no more than 4 mm thick. Top stretch tape. Then it is gently pressed into the putty. Speech mixture gently removed with a spatula so as not to move the tape.
While the reinforcement of the seams and joints is dry, we will deal with self-tapping screws. Sometimes they tend to rust and stained through the top decorative coating. Finishing specialists use paint or metal primer.
Well, if in the pantry the bank was lying around, then go ahead, to putty.By the way, at home, all this is perfectly replaced by the most common transparent nail polish. Apply dotted on the heads of the screws and give a good dry. 20 minutes is enough for the eyes.
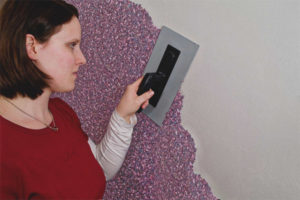
During this time, putty with reinforcing tape has already grabbed (after all, on the basis of gypsum). You can take sandpaper and gently grind all the irregularities. Only without fanaticism! In circular motions we remove notches, but not a layer of putty.
Naturally, glasses, a respirator and gloves have already been dressed up. For the dust turns out fine and caustic. After grinding, dust off the wall. This can be done with a brush or brush. The lacquer on the heads of the screws is already dry, now we need to align the grooves in the places of fastening. With a narrow trowel, in one smooth motion, cover the hole with a putty. The tool is held at an angle of approximately 40 °. If everything is done correctly, then on the place of the former dent there remains a flat smooth surface.
Now we have to wait for the putty to set in order to start the main work. Do not whine, then thanks say. Too lazy to do? Yes, sculpt the wallpaper directly on the drywall! After a while, you still have to change them. That's when we'll see how to tear them from the wall.With pieces of drywall or with whole plates?
You will not tear off. Just on top of the new stick. And why then bought foam vinyl now? How on them then will sculpt new wallpaper? I am an artist, I see it. Well, as they say, the master's business ...
There are recommendations to use two types of putty. One coarse grinding, for the main alignment. The second - small, for finishing. Why these expenses? Drywall is almost always ideally even, it does not need to be leveled. Instead of three layers and a week for periods of drying, one thin layer will suffice.
In addition, the primer has excellent adhesion. Even heavy dense wallpapers will not fall off. The main task of drywall puttying is insulation from wallpaper glue and toning in a light color. No need to impose 5 layers, one is enough completely.
Using a wide trowel, putty onto the wall with smooth, precise movements. Large irregularities smooth out immediately, small flaws after drying, are removed with sandpaper. With a wide spatula, cover up large surfaces with narrow angles and slopes.
After about 40 minutes, the putty is already enough to grab so that it can be easily polished.The final step will be applying the last coat of primer. This will allow the wallpaper glue to not soak into the putty instantly.
Council It is best to prime the wall with a liquid wallpaper glue solution. Then the glued sheets will be held very firmly.
Sticking wallpaper for drywall
After the prepared surface is completely dry, you can proceed directly to the wallpapering. The process itself is no different from working with a conventional wall. You will need:
- Wallpaper and matching glue.
- Capacity for glue.
- Rubber roller or plastic spatula.
- Short pile roller or wide brush.
- Construction plumb or rope with a heavy nut.
- Stepladder and assistant.
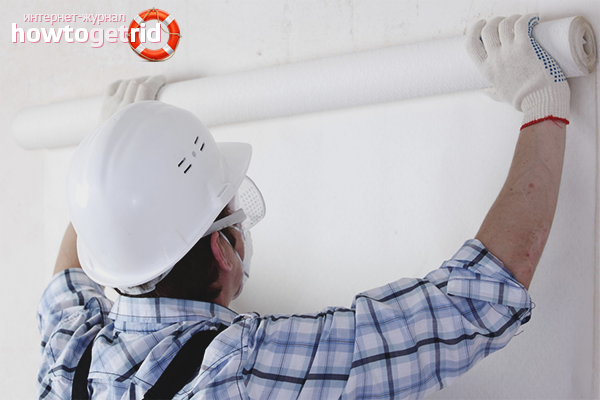
The order of work. If the wall is prepared correctly, then it will go like clockwork. They measure a straight line along the plumb line. For convenience, you can draw it in pencil. Then cut the canvas wallpaper on the height of the wall, plus 10 cm for allowances.
By the way, you need to buy wallpaper glue. For example, sculpt paper wallpaper on the road, for fiberglass - waste.And heavy non-woven on universal or ordinary - waste twice. Such an adhesive mixture will not sustain the weight, all your work will fall off, and you will have to re-buy materials for repair.
Council When diluting the glue, always measure 200-400 ml less water than the manufacturer recommends. As a rule, on a thick mixture of wallpaper stick better at times.
Plasterboard wall smeared wallpaper glue a little more than the width of the wallpaper. It is very convenient to use glue with dye. Immediately visible passes. Do not be afraid that the color will appear on the outside or be visible through the bright wallpaper. When dried, it disappears completely.
The canvas itself is laid out on a flat surface and is also applied with an adhesive composition. No need to wait for time to soak the fabric. Modern wallpaper does not need it. They can be glued immediately.
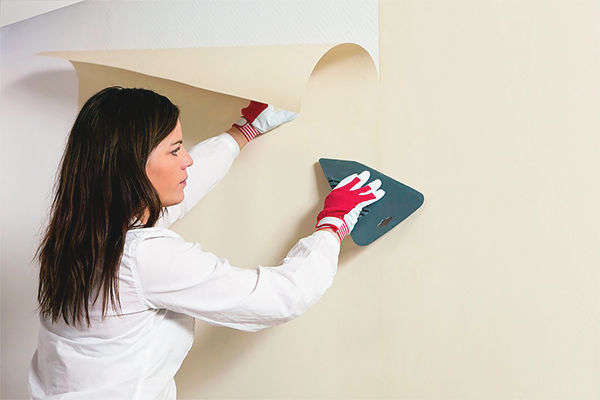
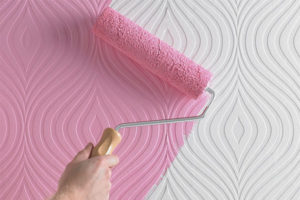
They start from the ceiling, gradually move down and at the same time from the center to the sides. Careful smoothing without strong pressure - a guarantee that the sheets do not fall off after drying. After sticking away from the wall and carefully look from the side. Suddenly there were air bubbles or wrinkles somewhere.Get rid of them immediately, after drying, they will not disappear.
By the way, it is better to smooth wallpaper with a three-dimensional pattern or bumps with a rubber roller, and not with a spatula. Otherwise, you may accidentally damage the embossed pattern.
Council Do not use old rags to wipe off excess glue. The fabric can be painted, and it will be difficult to remove the stain from the wallpaper.
To glue wallpaper on drywall is better to start from the window and finish at the front door. So there will be less noticeable possible flaws.
It is desirable that the joints of the wallpaper do not fall on the seams in the wall - this is a frequent recommendation in the articles. And what was the point then in gluing the reinforcing tape and puttying? Glue the wallpaper as it will be convenient, without regard to the seams and their ilk.
That's just with the corners of the room need to be careful. The most common mistake of almost everyone who makes repairs on their own is sticking a cloth in the corner. To do this, you must strictly end-to-end. Overlap or worse, the middle of the sheet, when dried, will stretch. Instead of the angle you get a semicircle. Consider it.
And further. Do not cut the entire roll of wallpaper in one dimension at once. The difference in height of the walls around the perimeter of the room may be too large.The result will be a shortage of several centimeters, or vice versa, cut too much. And if the wallpaper with a large clear pattern, then the selection and incorrect measurement of the length of the paintings will cause an acute shortage of material.
How to glue wallpaper on drywall? It turns out to be quite simple. The main thing - to properly prepare the wall. This will be 80% success. The remaining 20% is a matter of dexterity of your hands. A little zeal and everything will turn out. Successful to you repair without a headache and excess expenses.
Video: how to glue wallpaper with their own hands


To send