The content of the article
Not every modern girl can afford to spend a lot of time on a manicure. For this reason, experts in the field of the nail industry will develop new technologies to make nails beautiful in minutes. One of the new-fangled technician is considered the use of special water stickers with applied ornament. Each girl will be able to carry out the procedure, without necessarily possessing the basics of the art of drawing. As with any other matter, labeling includes its own features that must be considered.
The advantages of water nail stickers
- The film, which is attached to the nails, does not harm the plate. Therefore, many girls prefer to use water stickers in everyday life. Beautiful ladies have a great opportunity to change the design every day or every other day.Agree, neither shellac, nor building cannot brag of similar features.
- In addition to the above, water stickers do not stretch, which makes them convenient to use. They do not stick to the fingertips, like ordinary glide-based sliders. When contacting with warm water, the stickers do not change shape (they do not frown), this allows you to calculate the size and compare it with the periungual roller.
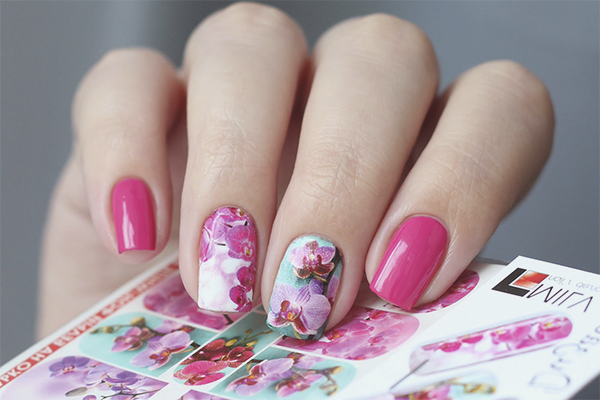
- To create a manicure you do not need to put special effort, drawing an ornament and sticking rhinestones. Leading manufacturers put on the market ready-made stickers with pictures, light patterns and full-fledged photos. In this case, you can find products in the form of lace with glitter and crystals attached.
- With the help of water stickers, you can select several fingers on your hand, it is not necessary to make a manicure fancy. In addition, a pleasant pricing policy attracts more and more girls. The use of water stickers for nails is 10–12 times cheaper than drawing a master of the same ornament with acrylic.
- Thanks to a large color palette and an unlimited number of different patterns, each girl will find an option for herself.In many rulers there are wedding stickers and other thematic areas (New Year, Birthday, Christmas, Easter, March 8, etc.).
- A positive feature is the duration of the socks. If you fix the water stickers transparent varnish, the result will continue for 1-2 weeks. In this case, the shade will not fade, chips and cracks do not form on the surface. Conveniently, the stickers are removed with ordinary acetone-free varnish remover.
Types of nail stickers
To date, the market is oversaturated with tools for decorating nails. If we talk about water stickers, there are 3 types: a usual slider, a photo print, a film with a volume effect (3D-drawing).
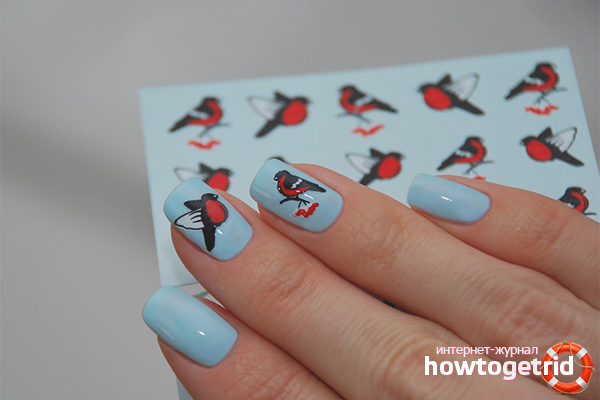
- Normal slider. Stickers of this kind are a film, transparent or having a uniform base with a pattern. To use the accessory, you need to moisten the sticker and attach it to the nail. The pattern may be small, covering only part of the plate. There are also large patterns to create a design on the entire surface of the nail.
- Photoprint. Stickers are a large sheet, on which are applied patterns or a single picture of the shape of the nail.Before you do a manicure, you must cut the ornament you like and match it with the size of the nail plate.
- 3D film. Stickers are available as a single sheet or as separate small stickers that do not need to be pre-cut. As the name implies, all the pictures on the film have a 3D effect. This feature makes the pattern voluminous, each piece of the ornament is clearly visible and convex.
Conventionally, all types of stickers can have drawings in the form of ornaments, patterns, plots. The first two subtypes are easily used, most often they are superimposed on a small part of the nail. Plots are more difficult to glue, they affect the entire plate, so you have to try to cut and overlay.
How to glue ordinary water stickers on nails
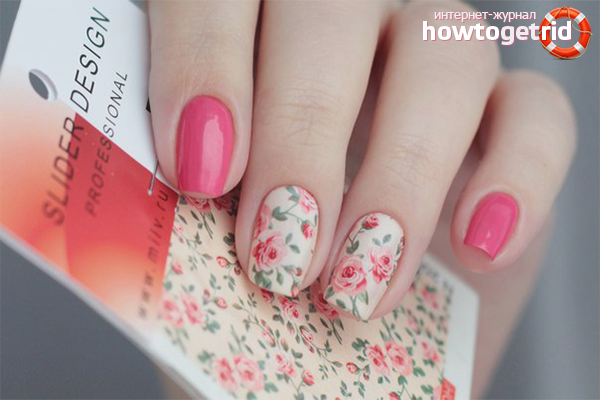
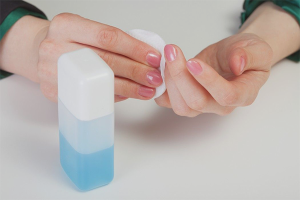
- Normal sliders for nail design are printed on colored, white or transparent paper, and then covered with film. It is attached to a degreased plate or varnish substrate by wetting with water.
- Prepare a manicure set in advance. You will need an antiseptic for hands, a buffer for polishing, forceps and a pusher for the cuticle, a manicure bath for steaming fingers, a nail file.You also need to take a bowl with water at room temperature, tweezers and a towel.
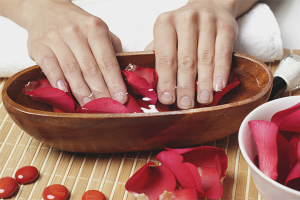
- Wash hands, degrease the surface of the nails, prepare a bath based on medicinal plants. Dip your fingers into a hot composition, wait a quarter of an hour, wipe your hands with a towel. Move the cuticle with an orange stick, remove the skin with forceps or thin scissors for manicure.
- Give your nails the same length and the same shape, file off the free edge. Puff the surface of the plate so that it is perfectly flat. Wash your hands again, treat them with an antiseptic. Degree the nails, wait 10 minutes until the composition has evaporated.
- Apply a base clear coat to protect the nails. If desired, the surface can be coated with any colored or white varnish (shellac). Dry the coating well, proceed to the selection of labels to create a future design.
- Prepare a bowl of water. Choose ornaments, cut out your favorite patterns or photoprints. Begin decorating with your little finger. Dip a suitable-sized sticker in the water, wait a quarter of a minute.
- Remove the slider with tweezers, dry with a paper towel from the outside, separate the film from the non-adhesive paper backing.Just gently attach the sticker to the surface of the plate, press your free hand with your finger. Align the picture, leave it until the moisture evaporates.
- Treat all fingers in the same way. Try to apply stickers, making a half-millimeter indent from the periungual roller and cuticle. Such a move will increase the duration of the socks. After gluing the sliders, apply 2 layers of finish lacquer to consolidate the design.
How to glue the photo print on the nails
- As mentioned earlier, photodesign can be made with a single plate, from which stickers are cut out independently under the shape of the nail. However, modern manufacturers have already taken care of this and created prints to fit the size of the plate.
- Film is not always glued to water, wetting occurs after attachment. An important step is to carefully seal the edges when applying the final coat of clear varnish. It is important to make the manicure airtight, covering the slider with the TOP completely.
- The use of technology is more complicated than when applying conventional stickers. Pre-cut all 10 elements on each nail.First prepare the fingers: remove the cuticle, shape the nails and polish them with a buff.
- Next, apply shellac or ordinary varnish (you can gel). Dry the coating partially, then proceed to attach the photo print. Separate the film from the substrate, grasp the edge of the element with tweezers. Attach to the nail, retreating 1 mm. from cuticle and periungual roller.
- Smooth the surface with pusher or orange stick, use a plain paper towel if you wish. Wrap the sticker on the free edge. File your nails with a soft glass nail file, removing the remnants of the film. Do not try to move the element.
- Similarly, glue the photo print on the remaining nails. Next, wait for some time, proceed to the application of the finish. You can use a special colorless varnish or fixer, it all depends on personal preference.
- The main thing is to seal the side spaces and the end of the nail very carefully to avoid moisture. A water photo-print is applied in the same way, but before gluing the element is moistened with water for 10 seconds.
It is easy to use water stickers for nails, a beginner can even perform the procedure.First, select the type of decor, then prepare the plate and cuticle for further manipulations. Cut out the ornament, moisten it with water, separate it from the substrate. Attach to the nail with tweezers, smooth the surface with pusher or orange stylus. Apply a finishing coat, wait for drying.
Video: how to glue water stickers

To send