The content of the article
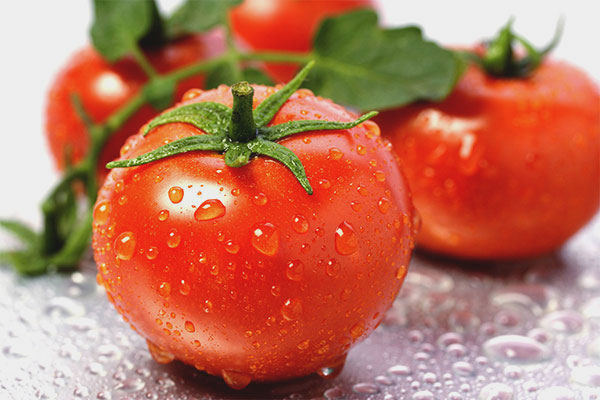
Tomatoes are representatives of the Solanaceae family. The Europeans and the Slavic peoples initially regarded with distrust the red vegetable coming from South America. But now tomatoes are actively used for making pizza and salads, homemade ketchup and various preservation.
Tomato seedling is better to grow yourself. Then you can be sure that the plant has received the maximum amount of nutrients, and will give excellent harvest.
Stage 1: Land
The seedling soil should be brewed for at least 3 weeks, if it has not been harvested since the fall, so it starts with the mixing of the components, and then proceeds to seed treatment.
As a basis you can use:
- garden land or greenhouses;
- humus or compost;
- river coarse sand;
- peat, but not in pure form;
- loam;
- mullein.
Components take approximately in equal parts. You can put more peat or earth, and less sand or compost. The soil should be moderately acidic. Mixing 3-4 components, it is necessary to disinfect the soil for growing tomatoes.
Method 1: High temperatures
Transfer the earth to a baking sheet, and send to the oven, turned on to the maximum. Hold for an hour. Instead of the oven, the black earth is heated in a microwave.
The alternative is to shift the earth into gauze and into a double boiler. Keep minutes 60–70.
Method 2: Cold Treatment
If the outside temperature falls below -15–20, pour the soil into plastic, cardboard or wooden boxes. Expose the courtyard or balcony. Keep a few days to the ground froze well. After entering into a warm room.
Chernozem, taken from the garden, often contains weed seeds or pest eggs, which are waiting for the right moment to attack the young seedlings. High or low temperatures help to destroy the infection, fungus and larvae.
The soil purchased in the flower shop, for the prevention can be poured boiling water, or treated with a solution of potassium permanganate.
A few days before planting seeds in the ground, you can add fertilizers that will stimulate the growth of tomatoes. Most popular (based on 5–6 kg of the mixture):
- superphosphate (30 g);
- urea (10–15 g);
- potassium sulfate (25–30 g);
- carbamide (10 g);
- wood ash (300–400 g).
To the base was loose, and for a long time retained moisture, you can add a coconut substrate or fine sawdust, for example, alder.
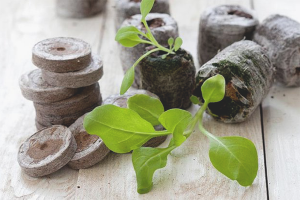
Tip: Garden owners who want to save time preparing black soil for tomato seedlings should visit flower shops and stock up on peat tablets. In such alternative pots, the plant does not have to dive down to the very landing in the ground.
Stage 2: Selection and preparation of seeds
Planting material is bought in bags by beginners, who have just decided to start growing tomatoes, and experienced gardeners who dream of trying exotic varieties. Harvesting seeds at home is quite simple, so gardeners with many years of experience using their own collected varieties.
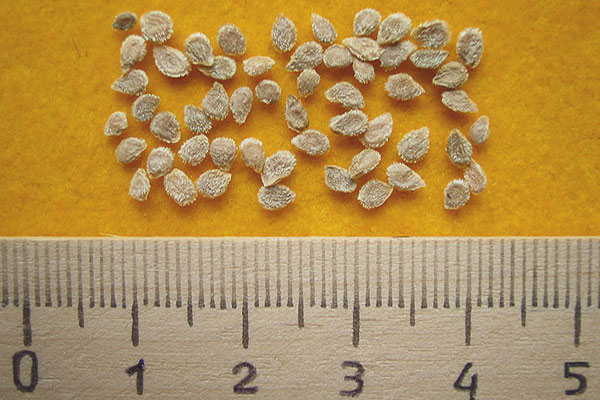
Purchased seeds do not need to be treated with fungicides or fertilized.Sometimes it needs to be soaked, in other cases, the seeds from the bag fall right into the ground.
Homemade preparations go through several preparatory stages, and only after that they become suitable for growing healthy and strong tomatoes.
Step 1: Selection
Use only medium or large seeds. Small, blackened or damaged discard and discard. Planting material is poured into a jar, and pour a solution: for 0.5 liter of liquid a teaspoon of salt. Split together with seeds, wait 10 minutes. Empty shells floating on the surface, pour into the sink. The precipitate is carefully poured into gauze, or a fine sieve, and rinse well in plain water.
Step 2: Disinfection
Dried preparations put in a gauze bag, and immersed in the solution. There are two options:
- Potassium permanganate: several crystals dissolve in water. The liquid should turn purple;
- Peroxide: 3% of the pharmacy in the amount of 3-5 ml diluted in 100 ml of boiled water.
The solution is heated to 40º, the seeds are immersed in it for 30 minutes. After disinfection, rinse off the residue under running water.
Step 3: Soak
- Find in the house a rectangular plastic box of cakes or a cake, you can take the food container.
- Perforate the container on the sides with a needle so that air can flow in.
- To send a bottom with wadded disks, or pieces of dense fabric (the gauze will not work), moistened in water.
- Lay out planting material on the workpiece.
- To level, so that the seeds lay in a thin layer.
- Place in a warm room in which the temperature does not fall below +20.
- Keep 3-5 days until the billet is full.
It is possible to moisten tampons in usual water, or to add to it willow broth, or juice from a three-year-old aloe. To get the last, you need to hold in the refrigerator a few sheets of plants, grind, and squeeze. Dilute juice with liquid in equal proportions.
Step 4: Make-up (optional)
Some gardeners before soaking immerse tomato seeds in the nutrient mixture to stimulate growth, and provide future seedlings with useful trace elements. The solution is prepared from water (1 l), to which is added:
- superphosphate 0.5 g;
- boric acid 0.02 g;
- copper sulphate 0.08 g;
- ammonium sulfate 0.1 g;
- potassium salt 0.3 g;
- and ammonium molybdate 0, 05
The average time for soaking and sowing seeds for seedlings:
Residents of the southern regions of Russia and Ukrainians can start preparing seed in February, so that the tomatoes are ready by May 20. The land in the garden will warm up well, and at night the temperature will not fall below 0, so tomatoes will take root in open ground without any problems.
Summer residents from the central regions of the Russian Federation are advised to engage in tomato seedlings from March 15. To plant tomatoes on the garden not earlier than the beginning of June, so that they do not freeze, and quickly adapted.
Growing seedlings in the northern regions is recommended to start on April 15, because spring comes late in Siberia and the Urals. It is possible to move the tomatoes to the garden closer to mid-June, when it becomes warm and the temperature stabilizes.
Which tomatoes to choose
In greenhouse conditions, well-grown varieties are well tolerated, capable of producing crops several times a season. In conditions of open ground preference is given to low-growing tomatoes, which do not need to be tied up.
Early-type seedlings provide summer residents with the harvest in the late spring - early summer. But she is capricious and gentle, requires careful care.Mid-season tomatoes ripen at the height of the season, and late ones are fresh tomatoes on the table until late autumn.
Stage 3: Disembarkation and Care
Tomatoes are well tolerated pick, so initially they can be planted in a box:
- Capacity to fill the drainage material, the thickness of the layer - 2 cm. Suitable nutshell or husk of sunflower, small stones, shredded foam or crushed brick.
- Pour the prepared soil, compact, and make holes or grooves.
- The depth of the holes for germinated seeds is from 0.5 to 1 cm, for dry seeds - 1.5–2 cm.
- It is recommended to make a distance of at least 2–3 cm between future bushes so that the roots do not intertwine with each other.
- The wells are poured over with water, and with tweezers or a match put 2 seeds in each hole.
- Type in the spatula of the earth, and sprinkle the tomatoes, but do not ram.
- Dry seeds can be sprinkled from the spray gun so that they will quickly hatch.
In a similar way, you can plant tomatoes in plastic pots, peat tablets, cassettes or milk bags. Some gardeners use disposable cups or cut bottles.The main thing is that at the bottom of the tank there would be one or several openings due to which the soil is saturated with oxygen.
From seed to germ
While the crops of tomatoes do not slip, boxes and pots with future seedlings are kept in a warm room. The optimum temperature for the normal development of tomatoes is + 24-26 degrees. The seed container is covered with foil, or put in a bag. Moisturize the soil with warm water, regularly sprinkling from the sprayer. If mold has appeared on the ground due to abundant watering, it is carefully removed and the black soil is disinfected with fungicides: “Fitosporin” or “Fundazole”.
The sun does not need seeds, but when the first shoots appear, the film is replaced with a glass lid, and the boxes are rearranged on the windowsill, or placed under a fluorescent lamp. Seedlings are constantly watered, but the liquid should not fall on the top of the plant.
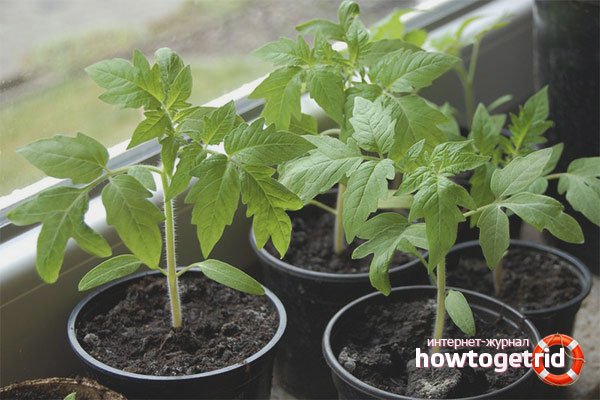
Picks are carried out when the tomatoes are strong, and they will have a minimum of 2 true, rather than cotyledon leaves.
Fundamental rules
Tomatoes are transplanted from the box into individual pots twice: first they are placed in small cups. The soil is abundantly watered, and the roots are taken out together with the clods of earth.Young bushes enough 200 ml of black soil to get stronger. It is recommended to add mineral fertilizers to the ground: a tablespoon per 5 liters of base.
The seedling adapts to the new conditions after 3 weeks, so the second time the pick is carried out exactly 21 days later. Enough 1 liter pots.
Tip: When transferring from a box to a pot, do not pinch the central root. The development of the injured plant slows down by several weeks.
About fertilizers
For the first time feed shoots aged from 2 to 3 weeks. It is advised to use bird droppings, biohumus or other natural ingredients. Young tomatoes can be fertilized with nitrogen, and the grown bushes more like potassium. If the plants turn yellow, urea or epine should be added to the soil.
Fluff the ground, mix water with fertilizer, and pour each bush out of a pipette or syringe.
Temperature conditions
Before picking, seedlings should be kept on illuminated window sills at +20. After transplanting to individual pots, increase to +25, maintain this temperature for a week. At night, you can reduce to +17. For the second week, reduce to +20. Gradually reduce the degree to prepare the tomatoes for natural conditions.
Stage 4: Hardening
It is useful to bring grown-up seedlings to the street, if outside the window is not less than +15. On quiet sunny days, you can open the vents for a couple of hours. Plants are afraid of direct sunlight, from them they turn yellow and wither.
2 weeks before disembarking, the tomatoes are left to “sleep” on the balcony, if the night temperature does not fall below zero. Do not forget about fertilizers that are applied to the soil every week - a maximum of 1.5.
The first flower brushes appear on the bushes aged 45–50 days. So, it's time to move the tomatoes in the greenhouse or in the garden. To postpone the landing for a week, you need to tear off the brush. The second will appear in 7 days, but you can’t pull more.
The seedlings, which are regularly watered, fertilized and tempered, quickly adapt to the conditions of the open ground. It is enough to loosen the land in a timely manner, to bring in water with nutrients, and the harvest will be royal.
Video: Some secrets and tips in growing tomato seedlings

To send