The content of the article
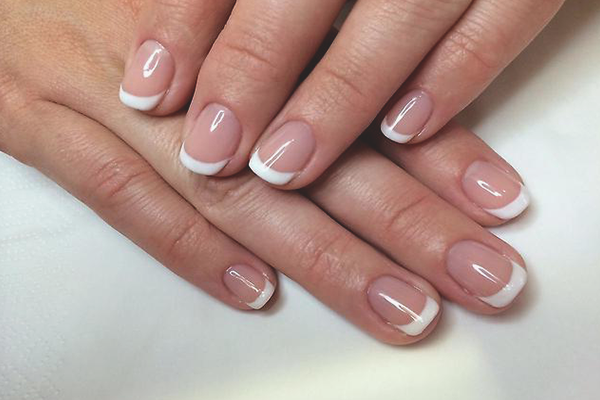
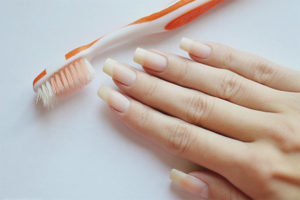
Building up the gel is very popular with the beautiful half of the population. Thanks to a special technology and strong tips, you can achieve the ideal length of the nail plate and make it flat. Artificial attributes are practically no different from natural, it all depends on the skill of a specialist. However, the procedure has a significant disadvantage - when the native nail grows, a pale pink band is seen near the cuticle. In such cases, it is necessary to carry out a correction, which we will talk about today.
Types of gel correction
- “Classic” correction (simple);
- correction "Difficult";
- mini correction;
- gel polish correction.
Necessary tools and materials
- You need to get a gel, with which the nails will be corrected.For french, a white composition or acrylic paint is required. For the substrate need a transparent gel base. In addition, you must purchase a base under the gel.
- Prepare brushes in advance for applying the composition. In the case of a French, the end of the tool must be beveled. In all other variations suitable convex brush.
- A degreaser is used to eliminate greasiness and dirt, it is sold in professional stores for nail masters.
- To ensure proper adhesion of the artificial composition with the native nail, you need to use a primer. It is acidic and acid-free, the choice depends on personal preferences.
- When carrying out the correction of gel nails can not do without a router (machine). Analogous are nail files for artificial coating of various abrasivity. You need tools with a stiffness of 100-240 gritt.
- To consolidate the final result, take care of the presence of a finishing coating (fixer, finish, top varnish). It will add shine to finished nails and provide protection for the next 2-3 weeks.
- After correcting the nails on the gel coating, a sticky layer forms, it is also called dispersed.If this feature is not eliminated, dust will stick to the plate. Therefore, get a special liquid to remove stickiness.
- Correction is carried out using paper forms, purchase them in a specialty store. You will also need an ultraviolet lamp with a power of 36 watts, without it drying the gel becomes impossible.
Important!
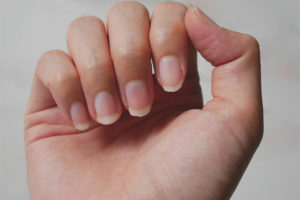
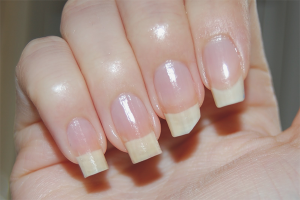
- Before proceeding with the correction, assess the state of the plate. Examine the extended nails, reveal where the gel has exfoliated.
- It is also important to evaluate your own health. Some ladies do not hold the gel due to high sweating of hands, hormonal disruptions, impaired care for extended nails, prolonged use of antibiotics.
- If you consider yourself in one of the listed categories, put off the correction for a while. Eliminate the cause, treat your health, only then proceed to the manipulation.
Classical (simple) gel nail correction
- The procedure is carried out after 20 days of artificial nails. The gel is superimposed only on those parts of the native plate, which are noticeably of the industry (cuticle area, lateral periungual roller).Correction takes no more than 1 hour.
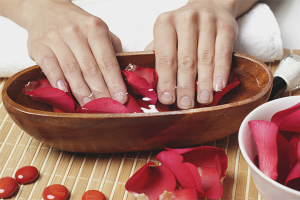
- Put on your hands an antiseptic, rub it, wait for the molecules to evaporate (5 minutes). If necessary, perform a European or cropped manicure. If the nails are too long, shorten the tips to the desired length and file the free edge of the plate.
- Assess the condition of the nails. Cut down the gel in places of detachment with the help of a nail file or a router. Sand the surface of the nail so that it becomes more or less even. Using a fine abrasive saw, remove the tubercle from the gel, because it breaks the symmetry and looks unnatural.
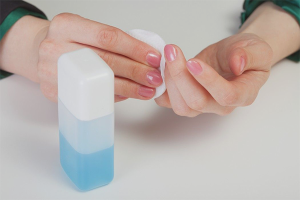
- Take the nail file number 240, make a plate of matte. Your actions must be careful and soft, otherwise the native nail is injured. Remove any dust with a paper towel or brush.
- Grind off the plates. Those areas of native nails that the industry needs to be primed for better adhesion. In no case do not apply the composition with a thick layer, otherwise the gel will peel off.
- Spread the base over the surface of the native nail and artificial plate. Send your fingers to the lamp for 2 minutes. If during the polymerization (solidification) of the gel you feel pain, take your hands out of the lamp, wait 5 seconds. Then send the nails again for drying.
- A sticky layer appeared on the surface, do not remove it.Using a brush, distribute the gel on your own nail, gently stretch it on the tipus, reaching the free edge. Do not allow the composition to spread, it should not come into contact with the cuticle. Keep a distance of half a millimeter.
- Send the gel for drying, the duration is 2 minutes. Apply a second layer, form apex - the highest point, which makes the nail plate natural, symmetrical. Dry in the lamp for 2 minutes.
- After the gel dries, file a coat with a low abrasiveness file. Give your nails a shape, make them as natural as possible. Do not damage the cuticle. Cover the finished work with a finishing varnish, dry it in the lamp for 2.5—3 minutes.
- If after applying the finish the adhesive layer remains, remove it with a special liquid after the final curing. The correction is over, if desired, you can make a drawing and apply special oil on the cuticle.
Correction "Complicated"
- The plate needs a difficult correction when you sneaked your nails for more than 1 month. The material has moved almost to the center, there are chips on the surface, some nails are broken.
- This type of correction is practically no different from the full gel building. Cut the material to the substrate so that a thin layer remains. Create a new nail, given the length and height of the apex.
- Adjust not only the front, but also the back of the plate. Mill frezerom all the irregularities, consider the length. In the case of aquarium design or jacket, you will have to restore the ornament again.
Correction "Mini"
- This type of procedure is considered to be the easiest and not requiring special efforts. Correction is performed at the end of the week (maximum) after the build-up. In this case, the gel is only slightly exfoliated, "right" it is not difficult.
- Take a glass nail file, remove patches of waste material. Remove dust with a brush, degrease the plate entirely. Apply a finishing varnish or fixer, dry it in the lamp for 2.5 minutes. If necessary, remove the adhesive layer.
Gel nail polish correction
- Some girls prefer to take a break between build-ups, and rightly so. In such cases, in order not to cut an artificial plate, carry out the correction with gel polish.This method will remove the artificial coating imperceptibly, while you will always have well-groomed long nails.
- Correction technology is identical to the classical method. In the process of polishing, remove the gel so that it becomes equal to the native nail as naturally as possible. Do not form the highest point (apex), because the symmetry will quickly disappear.
- Give the nail plate the required length, cutting off a few millimeters of the free edge. Adjust the form based on personal preferences. Primer the surface of the native nail, do not make the layer too thick.
- Apply to the surface of the substrate under the gel polish, dry. Then distribute shellac directly (2 layers), dry each of them in a lamp for 2 minutes. Fix the result with the finish, send your fingers to the lamp for 3 minutes. Remove adhesive layer if present.
- Gel Polish can not be adjusted. In about 20 days, the nails will grow back, you will have to remove the artificial covering completely. Next, the nails are either increased again, or remain in the original state.
Each type of correction is distinguished by the duration of execution, technique, the amount of material spent.The classical method is considered to be basic; it is from it that it is necessary to make a start when performing other variations. Prepare the necessary materials and tools in advance, take care of the availability of quality nail files and an ultraviolet lamp.
Video: correction of extended nails

To send