The content of the article
Are your neighbors below - lovers of loud conversations or karaoke night singing? Is this a problem for your family? Explanatory conversations with neighbors do not give a positive result? Everything is solved very simply. We do to ourselves and households slippers. Only instead of the sole we take bricks. The most common white bricks. It is possible and red, but they are easier, the effect will be weaker. As soon as loud sounds are heard from below - we clothe the “magic hooves” and wander around the rooms. I assure you, a week of such educational work, and the neighbors will weigh their decibels.
And since such shoes will crack your flooring in the trash, we will make repairs. At the same time and learn how to make noise insulation of the floor in the apartment. In fact, you will not carry all your life on their feet bricks to avenge noisy neighbors.
Before hiring a brigade of masters, consider all options for sound insulation of the floor.Most of the work can be done even by a person who is far from the subtleties of repair. Having learned all the secrets, it will be great to save on hiring.
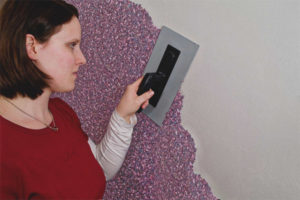
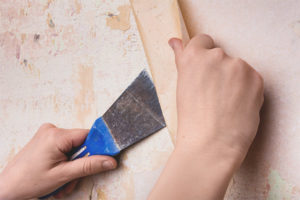
Since you broke a decorative flooring, it makes no sense to repair it. We will lay a new one. So you have to shoot everything to its very foundation. That is, to the carrier plate. At the same time and find out what kind of work on soundproofing the floor you have to. It all depends on what is under your floor. There are only two options: a concrete slab or wooden logs. Do not be surprised, in some old apartments interfloor overlappings are made of wood. From this we will dance.
Concrete slab
There will have to do soundproofing screed. Do not make round eyes, this is only a name long. A screed is needed, because you still sit without the floor. It is of two types, dry and wet. Now we will understand.
Dry way. For it use expanded clay, mineral wool, vermiculite. First, set the level of the lighthouses, then pour the material or lay layers of mineral wool. From above, all this stuff is covered with wood or chipboard.After that, you can install any decorative coating.
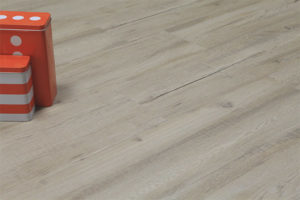
For example, everyone is so favorite laminate. Under him put soundproof foam substrate. This creates an additional sound insulation floor. Or thick carpet on the basis of foam - also a great addition to the main work. The room will be much quieter.
Just do not strive to make an absolute sound insulation of the floor in the apartment. It is impossible at home. After all, there are still walls, ceilings, windows, entrance doors. Will you isolate too?
By the way, the lighthouses at the end of the backfill and alignment can not be removed. Only if profiles for plasterboard were used, it is desirable to exclude their contact with the walls and fill with foam. This will eliminate their rattling.
In general, it is recommended for any kind of noise insulating screed to try as much as possible to limit its contact with the walls. Because structural noise is transmitted precisely by the construction of apartments. That is, the screed will not perform its soundproofing function, because the vibrations will be transmitted from the walls to the floor.
Council Before starting any work on sound insulation of the floor in the apartment, it is necessary to seal all the holes and cracks in the base plate with vibration-insulating silicone sealant.This already at times reduces the penetration of third-party sounds in the housing.
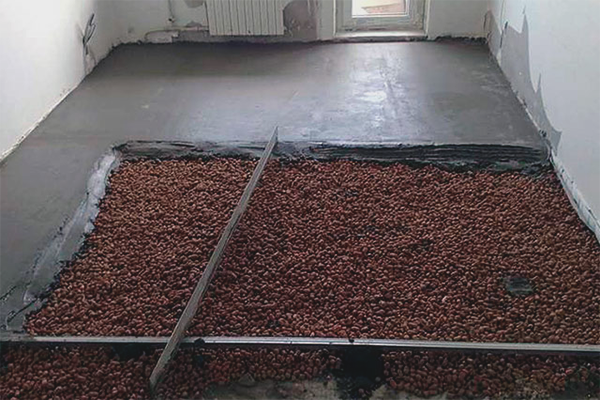
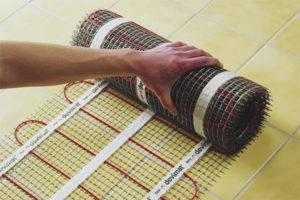
Wet way. It requires high material costs, but allows to reduce the noise level in the apartment by 38-41 dB. This is quite enough to feel practically in complete silence. To use this method will need:
- Cement-sand mixture. You can order from manufacturers, you can do it yourself.
- Thick thick film. It must be intact, without holes, seams or cracks. The size is selected taking into account the floor area plus overlap on the walls to the place of fixing the plinth. It is desirable that this was a noise insulation film.
- Directly noise insulation material itself. Elimination of expanded clay, foam plastic, special sound-proofing plates, rubber plates, rolls of technical cork, acoustic felt, basalt mats. The list is still big. Choose by the size of the budget of repair work.
- Another film or polyethylene. The size is equal to the floor area, but here the presence of small holes or damage is not critical.
- Liquid nails and strips of foamed soundproof material. The width of the strips is equal to the height of the future tie plus 2-3 cm. The length is equal to the perimeter of the room.That is, the hall 3 by 4 meters will need 14 meters of tape.
- Rule lighthouses, naked enthusiasm, gloves, a desire not to hear the neighbors and free time.
The order of work. Along the perimeter of the room, strips of foam are glued with liquid nails. This will prevent the appearance of sound bridges. That is, the screed is not in contact with the walls.
Then, noise insulation plates are placed on the concrete base or soundproof material is poured. What could pull on the money, then attach. Now thick film is laid on top or soundproof membrane. The overlap on the wall is attached masking tape.
Then you can install beacons. Just do not pierce the film through! We need waterproofing. It is advisable to fix them to the walls. Anyway then delete.
Next, pour the cement-sand mixture. By the way, independently kneading it is a thankless task. It is necessary to shovel not one kilogram of sufficiently heavy materials. Yes, and the desired density is problematic. We recommend ordering ready mix from manufacturers. It has excellent consistency and excellent plasticity.In addition, you can order a variety of noise insulation additives. For example, the elimination of slag or expanded clay.
After pouring it is necessary to level the mixture with the rule according to the established beacons. The next step is to cover the second film in order to avoid the appearance of cracks and forget for three days.
On the fourth day after casting, the lighthouses are lifted and removed. If they are left, they will play the role of sound bridges. After all, they were fastened to the walls, and these are unnecessary vibrations in the future. The notches from under the beacons on the finished screed are sealed with a cement-sand mortar and leveled with a spatula. Again covered with foil and forgotten for another 10 days.
After this time, the shelter is removed and the coupler is finally allowed to mature. In total, the drying time is approximately 25-28 days. This is a long time, but the result will be for almost a lifetime.
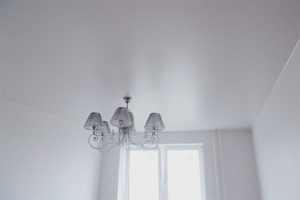
After all the work you can do decorative trim now soundproof floor. To do this, carefully cut off the remaining sound insulating film and foam strips above the finished tie. Desirable - flush with the cement floor.
And further. With further laying of tiles, parquet, laminate, carpet, an additional noise insulating substrate is required. At the same time, the decorative coating itself should not touch the walls.It is necessary to leave a gap of at least 5 mm. Then it is closed with a plinth, and the sound insulation remains at its height.
Council Some use thick carpets for soundproofing the floor in the house. No doubt, this coating dampens your steps or the noise from the running of your children. But no carpet is capable of drowning out loud conversation or singing of neighbors from below.
Hardwood floors
Let's say you opened the floors that were torn with “miracle-slippers”. And instead of the expected concrete slab you see wooden floors with strong lags. In this case, wet screed will not work for you. Too much weight. Here it is necessary to do only dry sound insulation of the floor in the apartment. It practically does not differ from a dry screed on concrete, but has its own characteristics.
You will need:
- Directly noise insulation material itself. When working with wooden floors, mineral wool, the elimination of expanded clay, and stone wool are best recommended. These materials breathe freely and are hygroscopic.
- Antiseptic for wood and strong brackets.
- Vibration-proof silicone sealant.
- Materials for the final draft coverage. This may be sheets of chipboard or new boards.
- Brush or roller, the desire to get rid of strong noise gloves.
The order of work. First, carefully inspect the wooden flooring for cracks, holes and damage. Absolutely each of them is coated with sealant. While it dries, we strengthen logs with brackets. Pre-carefully treat them with antiseptic from all sides.
After complete drying of both materials between lags or ceilings, we lay soundproofing material. It is advisable to keep the gap as small as possible. It is even better to lay the plates with some effort.
Do not worry, the floors will not swell from this. Because after the soundproofing works, a rough coating is laid on top. It perfectly aligns all the bumps and depressions from the plates. Now you can do decorative flooring.
By the way, here you can not wrestle with how to limit the contact of the walls with the floor for additional vibration isolation. Anyway, the lags directly touch the walls. It is better to look for high-quality soundproofing panels. They decompensate the vibration noise and at the same time warm your floors.
Council Do not use foam plastic or foam materials for sound insulation of wooden floors in the apartment.They do not pass moisture. In the future it will bring many problems.
Useful recommendations
- If, after all the work done on a wet screed, you are confused by the gap between the wall and the decorative coating, then you will seem to be blowing out from under the plinth. No, of course there is a foamed limiting strip down below and nothing can blow. But for your own comfort, cover this microscopic gap with vibration insulating sealant. After it dries, return the baseboard to its place. And now sleep well, no longer blowing.
- By the way, the plinth is also desirable to attach only to one base. Either the wall or the floor. Otherwise, then the vibrations of the structure will be transmitted to each other, and the technology will be broken.
- In modern apartments under the floor are many communications. Before performing noise insulation works, it is imperative to carefully insulate all wires, pipes and corrugations.
- Instead of a special foam soundproofing strip, you can use a rubber backing, pieces of roll cork, stone wool tapes. The main thing is that at the junctions of the pieces with each other there was not even the slightest gap.
How to make noise insulation of the floor in the apartment? Independently - not at all difficult. It is time-consuming and costly, but when and to whom did repair cost cheap? If you are afraid to break the technology, then hire a brigade of dressers. Only by all means ask for quality certificates for all the materials they use. After all, you should know exactly what you are going to pay for.
Video: wood floor insulation


To send