The content of the article
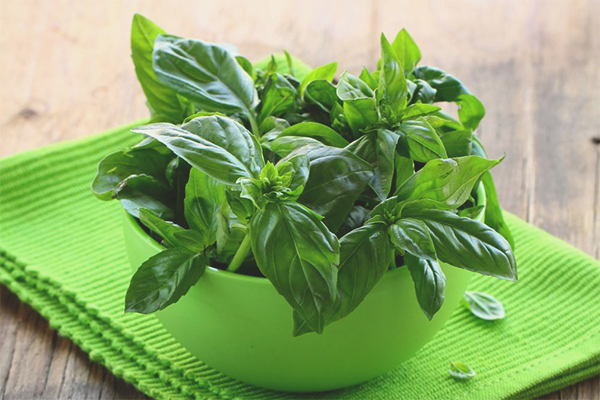
Purple basil is added to meat dishes, salads, lemonade and seafood, and lemon is used for cooking fish. Both varieties can be grown on a windowsill in wooden boxes or ceramic pots. Spicy plant with a rich aroma gives a harvest all year round. Even people who have never had their own summer cottage and garden will be able to care for an unpretentious culture.
Planting material
Flower shops sell sprouts and basil seeds. Ready seedlings more delicate and whimsical. They often do not survive and get sick. Seeds better adapt to unfamiliar soil and produce strong and healthy shoots.
Beginners are recommended to buy small-leaved varieties of basil:
- Clove Scent;
- Yerevan;
- Marquis;
- Baku;
- False;
- Dwarf;
- Osmin.
Squat and compact varieties consume less micronutrients and nutrients.Shrubs with broad and fleshy leaves should often be fertilized with special feeds. The aroma and beneficial properties of basil do not depend on the size and shape.
The first shoots will appear faster if you prepare the seeds before planting. Planting material is poured into a container or plate covered with gauze, and some warm water is added. Basil is soaked for 2 days. The liquid in the tank is changed every 12 hours. Stagnant water becomes a source of mold. Microorganisms damage seeds and destroy future seedlings.
The container is placed next to the battery. Heat awakens the plant and starts the formation of sprouts. After soaking, the swollen seeds are treated with a light pink solution of potassium permanganate. Planting material is left in the disinfectant for 2 hours, and then caught with a toothpick or gently filtered. Pour on a dry gauze, you can take a piece of cotton cloth or paper napkin. Planting material is left on a rag until excess liquid is drained. At this time, prepare the soil and containers for basil.
Substrate
Flower shops offer soil for spicy herbs, but do not recommend buying it. The soil from the package is quickly depleted. Before planting seeds, it is necessary to soak the substrate twice with a solution which includes:
- superphosphate - 50 g;
- ammonium nitrate - 20 g;
- calcium chloride - 15 g.
Fertilize and the land brought from the garden, but only once. Soil can be taken from the potato field, cottage or forest edge. Before use, the substrate is poured on a baking sheet and calcined in an oven at a temperature of 100-120 degrees. In this way, they destroy the eggs of insects and disinfect the soil. The base after disinfection is watered with a solution of superphosphate and nitrate to enrich with nutrients. Biohumus and a universal substrate for indoor plants can be added to the usual soil.
A two-centimeter layer of pebbles or broken bricks is poured into a pot or box. The drainage used is shredded foam, clay shards and expanded clay. The next layer is the substrate. The pot is filled to two-three, retreating from the sides of 3-4 cm. The earth before planting the seeds is watered abundantly.
Landing
Basil grows best in individual pots or oblong wooden boxes. Square containers are not suitable. Culture has a thick root system. If the bushes are intertwined with each other, then the seedlings will turn out weak and sluggish, half of the crop may simply die.
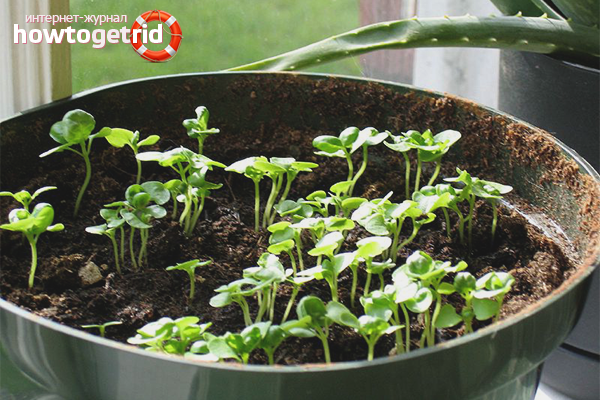
Seeds spread on wet ground with toothpicks. The land is divided into squares 7–10 cm wide. A small depression is made in the center, a grain is placed and covered with soil. Immediately cover with cling film. No need to water. Tanks with basil, wrapped in bags, clean in a warm place until the first shoots. Usually sprouts are formed for 7–12 days, depending on the variety and temperature conditions. The film is periodically opened to prevent condensation from accumulating in the pots. The package is completely removed after the appearance of seedlings. Capacity with basil is transferred to the illuminated window sill.
Instead of wooden boxes and clay pot use disposable cups of 0.25 l for growing seedlings. Several drainage holes are made in the bottom of the plastic containers to prevent water from accumulating in the substrate. Saplings live in cups until two full leaves are formed.Then the plastic dishes are cut, carefully removed the earthen ball together with the root system and rolled into clay vases, in which the spicy bush will grow. Disposable pots are put on a tray and stored in a warm place, each covered with cling film or wrapped in a bag.
Tip: If the basil, planted in boxes, is too thick, remove the excess shoots. Fingers pinch off the top, and the root is left in the ground. Over time, it will decompose and turn into an additional source of nutrients for young shoots.
Care of seedlings
Seeds are germinated at a temperature of + 23-25 degrees. Capacity with young shoots put on the southeast sill. Basil is sown in April or May, when the day becomes longer. Saplings need a lot of sunlight.
The film is removed when there are 2 true leaves on the bushes. For the first time, the improvised cover is removed for 5 minutes. The ventilation time is gradually increased, and after 2–3 weeks, the film is discarded and the seedlings begin to harden.
Young shoots in the morning and at noon, sprayed with warm settled water. The liquid is heated to 30 degrees.In the evening, watering is not carried out. The temperature of air closer to the night drops, and the water does not have time to evaporate from the ground. Liquid stagnates, causing mold and root rot.
The earth in a pot is loosened weekly with a fork or a special rake so that no crust forms on the substrate. Hardened soil does not allow air to pass through and slows down the development of the root system.
Basil fertilized every 2 weeks, so that the bushes do not lose taste. The composition of the correct feed for a spicy plant includes:
- calcium;
- nitrogen;
- potassium;
- phosphorus.
For the first time, fertilizing is introduced when the bush reaches a height of 40–50 cm. Before the fertilizer, the ground is necessarily loosened so that useful trace elements are absorbed into the root system along with oxygen particles.
Basil does not tolerate low temperatures. The leaves lose their rich tint and taste. If it is cold outside, the pots on the windowsill are wrapped with cling film. The material retains heat in the substrate and protects the root system from freezing. When it is cold, spicy plants are covered with plastic bags so that the bushes will not wilt.
Indoor basil is sick less often than the garden one, but sometimes saplings are attacked by fusarium and gray mold. Harmful microorganisms breed in stagnant water and over-wetted soil, so the land should be watered no more than 2 times a day. The excess moisture accumulated in the pan is immediately drained into the sink, and the bottom of the containers is wiped with a dry cloth.
If islands of gray mold appear on the soil, the top layer of soil is removed and discarded, and the remaining substrate is dried. Watering is stopped for 3-4 days. Renew after drying the earth. Fertilizers for vegetable crops are introduced into the substrate with water. Leaves and stems affected by a gray bloom are removed and discarded so that harmful microorganisms do not spread to healthy specimens.
Beginners who decide to start growing basil in December or February will have to buy a fitolamp. Duration of daylight for a spicy plant ranges from 15 to 18 hours. Shrubs wither and get sick because of the lack of ultraviolet radiation. Natural sunlight is replaced with artificial. Ordinary fluorescent lamps can be used, which are installed at a distance of 25-30 cm from the pot.
Halogen light sources provide artificial ultraviolet light to the bushes, but they heat up too much. With prolonged use of such lamps plants can get heatstroke. Halogen variants are used in the coldest days for lighting and heating basil growing on the balcony.
Tip: Peduncles that appeared on the bushes of a spicy plant are immediately removed so that the seedlings do not lose their rich aroma.
Young shoots and adult specimens do not tolerate drafts. Basil containers should not be placed on window sills, if there are gaps in the frames, and also leave them next to open windows or windows.
Shrub formation
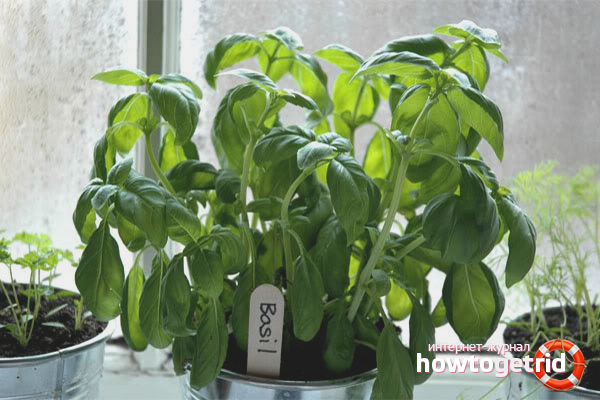
The first harvest is harvested 1–1.5 months after planting. At the basil are formed four full sheets. If less, the plant is not ready for pruning. To bush became lush, you need to gently pinch the top. After the procedure, the spicy plant is carefully looked after: water, fertilize, loosen the soil and protect from drafts.
Crop harvested a year. Sharp scissors cut the leaves from the side shoots. Tearing hands is not recommended, so as not to damage the seedling.Wounds with jagged edges heal more slowly than hemp left after using a sharp blade. There should always be at least 3-4 leaves on a bush, otherwise the culture will not be able to recover and will die.
Cut the shoots stored in plastic or glass containers. In iron cans and containers the characteristic aroma and part of useful components are lost. In the right pot basil can lie from 3 to 5 years.
Growing spicy seedlings on the windowsill is not as difficult as it seems to beginners. The main thing is to observe the temperature and light conditions, timely water and fertilize the plant. Basil, which is properly looked after, is lush and thick, with a pleasant and rich aroma.
Video: how to grow basil at home


To send