The content of the article
Polyurethane foam is used during installation of windows and window sills, doors, plumbing fixtures and other; it is widely used as a heat insulation material - all cracks are tightly sealed with it; it is indispensable in the manufacture of sandwich panels. Foam can become not just a magic wand, which will eliminate any flaws and flaws made during construction, but also an indispensable tool at all stages of work. And since its use without aids is impossible, it is necessary to be able to handle a special gun.

Types of foam
There are regular and professional foam. The first is the one that was used everywhere (and even now too) years ago by all who decided to repair or replace windows and doors on their own, without the help of specialists.A special screw-on tube was attached to such cans.
And spray foam canisters, the tip of which is designed in such a way as to connect it with a gun, is a professional material. There are no particular differences between them, in addition to an auxiliary tool, but ordinary foam is more suitable for small household repairs - fix something, connect it to each other. Professional is more durable and stable, but the method of its use is somewhat more difficult due to the fact that it is necessary to have a gun and be able to use it.
In addition, foam differs even in seasons - winter, summer, demi-season - that is, depending on its resistance to weather. Attention should be paid to this if external work is imminent. The same is true for direct use - on the cans it is mandatory to indicate for what purpose the material is intended, because the insulation, for example, of the pipeline and the installation of a heavy entrance door, differ greatly among themselves. Be sure to choose exactly the type of foam that you need.
Precautions when using foam
Be careful when applying the foam - do not push the valve too hard, so that the contents of the cartridge go out evenly and in small quantities. Polyurethane foam is very badly scrubbed and can later spoil the coating, so it is best not to allow excess material to get on other surfaces. With the same purpose, you can use the following tricks, the so-called life hacks, which will “hold” the foam in an upright position, will not allow it to slip:
- To foam wide gaps (more than 1 cm), sprinkle them with water a little;
- For holes wider than 3 cm, use cardboard - divide the area into steps of 10-15 cm and separate them with each other with a thin cardboard, seal it; after removing the cardboard, tiny slits will remain, which are already much easier to repair.
Remember that the mounting foam expands and grows in size as it solidifies - so, the usual one can “swell” three times, and the professional can later fill the area by about 70% more than the original. Therefore, the excess will be in any case, even if you are extremely carefully and economically distributed substance, and they need to be removed with a knife.
If a nuisance has happened, and the foreign surface is still damaged, do not try to wash the foam this very minute. Let it first completely dry and harden, and then carefully scrape off. The remaining trace can be removed with acetone, and on the lacquer, enamel or fabric coating - with special detergents, since it can swell or lose its color from acetone and the object will be irrevocably damaged.
Foam Gun Use Rules
Preparatory stage
Shake the can of foam thoroughly (at least 20 times - about 15-30 seconds) and remove the cap. On the gun, turn the adjusting screw clockwise until it stops to close the valve, then attach the container so that it is under the gun.Loosen the adjusting screw in the opposite direction by half a turn and gently pull the trigger until the foam comes out - this is a sign that the tool is ready and you can start working. This regulator will subsequently open and close the output of the contents.
Using a gun
The main rule - a cylinder with mounting foam should be on top, above the gun, and in an upright position. Only in this way the gas will push the contents of the tank, otherwise it will just come out, and the balloon can be thrown out for unsuitability. If the muzzle of the gun is not enough to penetrate into a hard-to-reach place, use the false pipe, it will serve as a kind of extension.
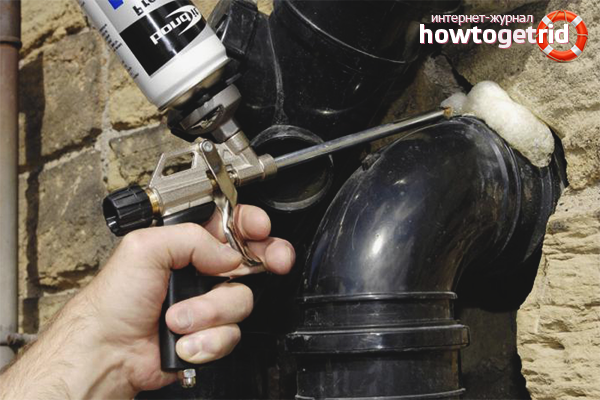
Before work, thoroughly clean the surface, moisten with water (but this is not suitable for winter, as the liquid will turn into an ice crust). Attach a pistol nozzle to the seam being sealed and pull the trigger. Do this smoothly and use the adjusting screw to set the desired foam output speed. Do not pull the nozzle out of the foam and try not to make sharp pressure on the valve - this will entail uneven seams, as well as the occurrence of voids and ruptures, which are then almost impossible to level off.Fill the wide long vertical seams from the bottom up - as you move higher, the foam from the bottom dries out and creates a support; from left to right.
Do not forget to shake the can periodically, especially if you work continuously for a long time.
The final stage
Close the gun by turning the screw all the way clockwise. Do not disconnect the foam bottle until it ends - you can still use this material for a month. If you nevertheless removed the cylinder, as in the near future no assembly foam will be needed, clean the nozzle - removing the foam when it dries is very difficult from there.
To reuse, shake the gun with the mounting foam again, remove the dried particles from the tip, loosen the screw and let the accumulated foam come out; after that you can start work.
Replacement spray
After emptying the canister, insert a new one into the gun. To do this, make sure the old one is really empty and delete it. Close the valve, locking the adjusting screw in the desired position, shake the new cylinder and screw it on the gun.If the gearbox is clogged, clean it with acetone or a cleaner. Unscrew the screw and immediately fill the gun with foam.
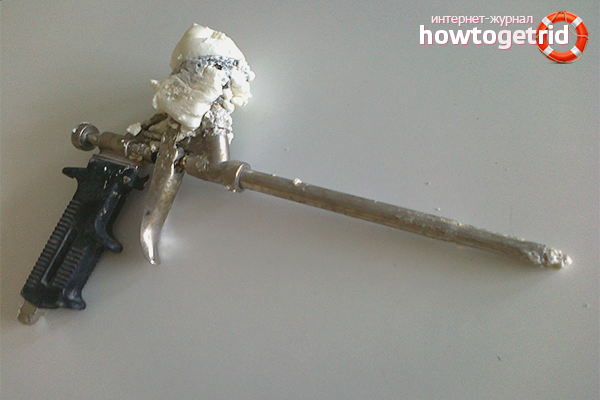
Gun cleaning
In order to clean the gun when all repair work is completed, and there is no need for assembly foam, it is necessary to unscrew the cylinder with the substance (most likely, it will have to be thrown away if not used for a couple of weeks, since after this period the foam dries inside) . Then there are two options for the development of events:
- Buy a special cleanser and screw it in place of the foam canister, lower the valve and fill the gun. Leave for 10 minutes, rinse with cleaner again and unscrew the cylinder. Wipe the gun with a clean cloth.
- This method is suitable for those who fully own their own hands, and I am sure that I can not damage the gun. Although if the foam hardens inside tightly, it is still no other way to remove it. First you need a knife to gently remove adhered outside material, and then disassemble the gun into parts. Next, you are looking for a long thin wire, stocking up with acetone, patience and accuracy.Acetone should be poured on the dried foam and gently nudged with wire - the material will soften and it will be possible to do it. The muzzle itself is cleaned in the same way - gradually pour in acetone or solvent and, if the matter is completely neglected, pull out the dried foam in pieces, gradually pushing the wire inwards so that it comes out from the opposite end.
If you do everything right, the gun will serve you for many years. With regular use, it is recommended to clean it every 2-3 months, regardless of the frequency of changing cylinders with foam.
Video: how to use the gun for mounting foam


To send