The content of the article
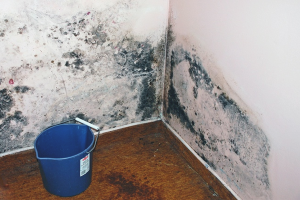
When the long-awaited spring comes, many start having problems with the flooding of cellars and cellars. Such an unpleasant situation happens because of a rise in the level of groundwater. The earth becomes like a sponge, which absorbs water and holds it in itself. If the level of groundwater rises above the basement, then moisture seeps into the room through cracks.
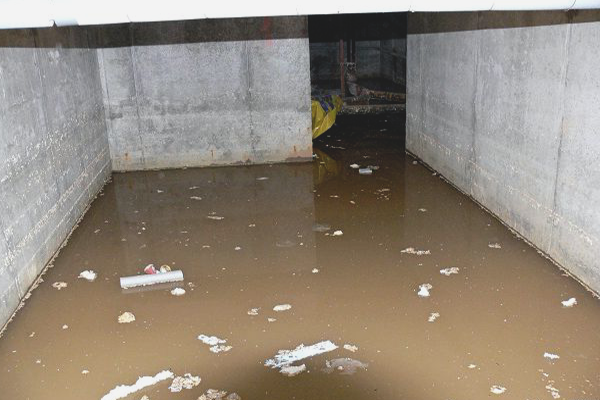
The reason for the flooding of the basement is the first aquifer. It is formed from nearby rivers, lakes, reservoirs. Also, the level of groundwater is influenced by melted snow and precipitation in the form of rain. There are several ways to help cope with annual flooding. If you choose one of them, you can make the basement dry.
Creating a drainage system
Drainage is a drainage system consisting of trenches, pipes and a well.With it, it is possible to prevent the flooding of the basement, as well as to drain the land. The drainage system is made at the basement construction stage. Properly installed system will help once and for all forget about water in the basement and protect the foundation from destruction.
How the drainage system works
The basis of the drainage is a large diameter pipe (at least 100 mm). It has holes all over the surface. Through them, ground water seeps into the pipe and flows into the collector. In order for the system to work well, you must create the following conditions:
- Dig a trench with a slope around the basement below the floor. This will ensure efficient water collection and runoff.
- It is imperative to use filter materials (geotextiles and crushed stone) that will protect the pipe from flooding.
- To drain to the central sewage system, where a large amount of groundwater will accumulate.
What is necessary:
- a drainage pipe wrapped in geotextiles;
- small, washed rubble;
- geotextile fabric;
- river sand.
Installation
- Make a trench below the level of the floor around the foundation and a deep well at a distance of 10-15 meters fromthe buildings. The trench should have sufficient slope for water runoff.
- Lay a geotextile into the excavated trench. And then pour rubble (layer thickness 10 cm). Thus, you create a primary layer that filters the groundwater.
- In the next step, lay a drainage pipe (preferably a double layer in geotextiles) on a layer of rubble. Check that the slope is maintained throughout the trench. Using a tee, lay the outlet pipe to the well.
- Lay the pipe, completely fill with rubble. Leave 20 cm to the top of the trench. Fold the free edges of the geotextile fabric over the gravel. This will completely isolate the drainage from the ground. After that, fill the trench with sand.
As a result, you get a reliable drainage system. Geotextiles and crushed stone perform the function of a filter, not allowing the perforated pipe to be blocked. And sand will provide transportation of moisture from the soil surface to the drainage channel.
Conclusion
Drainage channels installed around the basement will help eliminate the main cause of flooding - high groundwater levels. The result of the drainage will be a dry basement.Unfortunately, this system has its significant drawback. It is customary to install drainage channels (according to technology) outside the premises, therefore not all of the basements will be so equipped.
However, in exceptional cases, cellar owners may build drainage channels inside the premises. The installation process is almost the same, except for some moments that occur during the floor screed stage. After installing the internal drainage system, the basement will lose 30 cm in height.
Creating an automatic water pumping system
Not all basement owners have the opportunity to create a slope with a drainage water drainage system. Therefore, on such sites use another method. To drain the room set automatic pumping system of excess water.
What does that require:
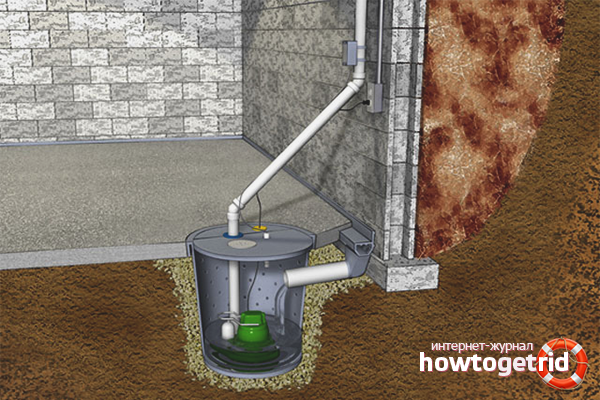
- Create a recess (pit) in the basement. Dig a hole 50x50x50 cm in size. Then reinforce it with concrete or brick masonry - this must be done to prevent the walls from breaking down. Pour 10 cm thick gravel into the pit.
- Purchase a special pump that automatically turns on when a certain level of water accumulates.
Installation
In the excavated pit, place the pump, connect the hoses to it and move them away from the room. When the volume of groundwater increases, it will first accumulate in the pit. The pump will work, reacting to the level that has risen, and will pump out excess moisture. This will continue until the groundwater finally subsides.
Conclusion
A fairly simple system that is inexpensive. Quickly installed and easy to configure. But this system has two significant drawbacks. First, the pump is working properly until it has exhausted its resource, and then it will have to be replaced. Second, the drainage system will not eliminate the cause of flooding, but will only relieve the consequences for a while.
Creating waterproofing in the basement
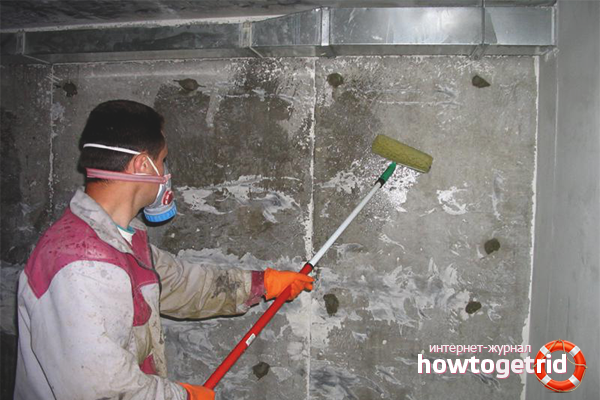
Waterproofing walls and floors helps to ensure a quality waterproof barrier. It consists of three layers: penetrating waterproofing, bitumen mastic and plaster. Apply the layers above the flooded level with a margin of height in case the groundwater rises.
What does that require:
- Buy materials: as a penetrating waterproofing used hydroteks or penetron, bitumen mastic, sand, waterproof cement, metal mesh for plaster.
- Assemble the necessary tools: a hard brush and a spatula for applying the compositions, an iron brush for grouting between brick joints or cracks, a mixer and a container for mixing the mortar.
- Prepare a basement: deflate the water - for this it is convenient to use the pump "Kid" with a lower aspirator. After draining, clean the surface of the floor and walls from dirt. Brush seams, corners, cracks.
Installation
- Treat concrete floor and walls penetrating waterproofing. This compound is deeply absorbed and clogs the macrocracks, through which water penetrates into the basement.
- Then smear bitumen mastic corners, seams, cracks. Then, in the same way, apply mastic on the remaining surface of the walls and floor. Layer thickness must be at least 2 cm.
- Attach the metal grill to the wall. It is necessary to ensure the rigidity of the plaster layer. Prepare cement mortar, medium viscosity. Using a spatula, apply a layer of plaster 3 cm thick.
- Put the metal mesh on the floor and pour in the cement mortar and let it dry. This process of creating a basement waterproofing can be considered complete.
Conclusion
The waterproofing layer prevents the seepage of groundwater through cracks. It also makes concrete stronger, extending the life of the walls and floor. The waterproofing method is an excellent alternative to the drainage system, which is not possible to build in all basements.
So, the above methods to combat the flooding of the basement will help get rid of excess water. Each has its own installation features, advantages and disadvantages. You need to choose a method based on specific goals and financial capabilities.
Video: how to do drainage in the basement with your own hands


 10 votes, on average: 3,90 out of 5


To send