The content of the article
Small bathroom? Or just prefer a shower over a bath? If at least one of these questions you nodded in agreement, it means that this article will be interesting to you. Here we will talk about how to install a shower tray in your bathroom.
However, not all at once. It is important to know the installation technique, but first we will look into the types of pallets and other important nuances.
Types of pallets. Making the right choice
Pallets are quite diverse. Color, material, depth, shape, and size — all of these parameters vary between models. If you already bought the pallet - great. But if you are only at the stage of choice, we will try to help not to be mistaken.
Differences in shape and size
A total of 4 basic forms of shower trays can be distinguished:
- Square (with face sizes up to 130 cm);
- Rectangular pallets have a minimum size of 70x80 cm;
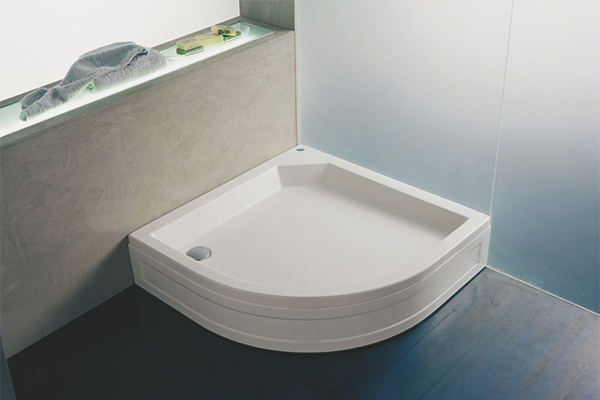
- Semicircular - 80x80, 90x90;
- Pentagonal - 100x100 cm
In addition to the form, pallets differ in depth. So you can buy plumbing with a depth of only 4.5 cm. The maximum rate is 18 cm.
Dimensions are not all. More details can be found already with the purchase. However, you should consider the size of the bathroom. But you should not forget about comfort. If the small size confuses you, and the minimum depth causes discomfort, it is better not to save and choose a more dimensional pallet.
Differences in production materials
Materials for the manufacture of shower trays enough. The main ones are: acrylic, ceramics, cast iron, steel and even marble. How to choose yourself? The answer to the question lies in another question. Quality or appearance. The fact is that some materials are more durable, others are more recent in a design decision. Therefore, you should decide what is more important to you. Or you can combine both qualities. But then there is a problem in financial terms.
The best option would be a pallet of marble. In terms of external parameters and strength, none of the above options compare with it. However, this financial plan also affects this.The cost of the pallet is high compared to other models, so not everyone can afford it.
If you rely on strength, then do not overlook the iron and steel models. The first also have an attractive appearance, which, alas, can not be said about the second option.
Acrylic and ceramic pallets have a beautiful appearance. However, compared with plumbing from other materials - more fragile. Despite this, it is acrylic pallets bought most often. Many are not embarrassed by the fact that even under the weight of a person, they already bend and can crack. In fairness, we note that this can be avoided. This is done by pre-installing a special stand for the pallet. I wonder how to make it? We read further.
Basics of mounting an acrylic pallet
Since we have touched upon the installation of acrylic pallets, we will not deviate from the course and immediately analyze the installation technique.
First of all, it is necessary to determine the stand for the pallet. It can be installed on the floor, and after adjust the legs. However, it is better to mount a brick stand, which will provide support from below. So the pallet will be more confident, and you will not have to wait with caution for the day when the cover will burst.
Basic installation steps
About the brick substrate, you already understand. But let's look at everything from the very beginning. It should be noted that further instructions apply to all pallets, not just acrylic. So let's go.
We have already discussed the parameters of pallets and how to choose them. However, there is another nuance that lies in the drain holes. Usually they are located at the bottom, but there are options when the holes are offset to the side. This also should not be forgotten during the selection of the pallet.
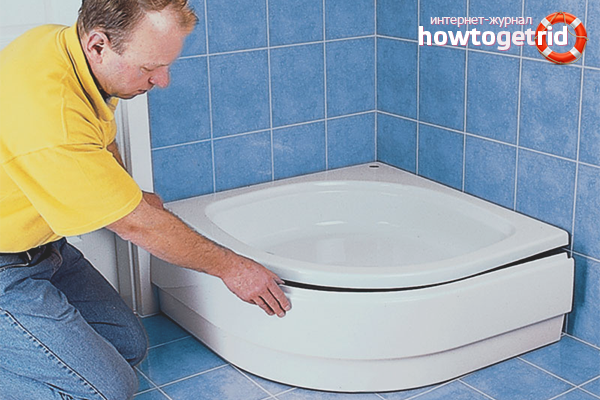
When the bottom of the shower was delivered, you can proceed to the main work. The most necessary thing is to make markup. To do this, put the pallet in the selected location and circle it with a marker. Also, do not forget to specify the place of discharge. Try to avoid errors in the markup, so that no further problems arise.
After that, remove the pan, disconnect the drain hole on the part, the output of which is connected to the main sewer pipe. Do not forget that the location of the hole must coincide with the previously applied markings.
Now again, take the pallet and try on it in accordance with the markup. If the hole is perfect, you can continue and mount the pipes.Remember that their joints should be well sealed. In conclusion, the pallet itself is installed.
Tips
Disputes about how to install the pallet - exactly or with a slight bias, probably never end. In fact, there is not much difference. And if the essence of the perfectionist has been played out in you, and you want the pan to stand perfectly even - stock up on the water level. But if they considered it necessary to install the bottom of the shower with a slight bias, be sure to take care of additional strength.
Remember, we talked about how important it is to install bricks under the acrylic tray? If not, raise the page a little higher. So, in addition to support, they serve as a sound insulation coating for your neighbors. The water that will beat on the pallet will be incredibly audible among the residents of the lower apartment. If you do not want them to know the schedule of your trips to the shower, or just want to protect other people's nerve cells, sound insulation is a must. However, it may not be just bricks. Now you can buy modern materials that do their job better.
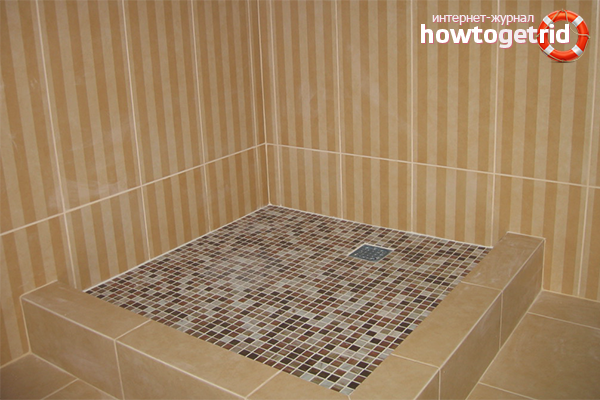
Want to visually expand the pallet? Cover it with a brick, on which you glue the ceramic tile. Why ceramic? It best tolerates high levels of moisture.In addition, the tile is better to install with a slight bias towards the pallet. So the water will not stay on it.
We make the pallet with our own hands
Often they say that you have golden hands? Then maybe you will try to make a shower tray with your own hands? What are the advantages of this method?
- You can choose any shape and size;
- At the same time save something;
- And once again make sure that your hands are really golden.
However, think again before you get down to business. After all, the work is really not easy. Did not change your mind? Great, let's begin.
To begin with, we determine and establish the place of flow, the height of which must be at least 20 cm from the floor. However, not in a hurry to secure it. You will definitely do this, but a little later, when you have completed all the calculations and made sure that they are correct. After that, you can fix the stock. This is obvious, but still recall. The drain should go to the main sewer.
There is still a lot of dusty and hard work ahead that can damage the stock. To prevent this, it should be covered with a metal pipe that fits in diameter and attached to the floor with hose clamps.Next you need to create a platform for the future pallet. To do this, lay bricks around the perimeter, which should be poured with a concrete screed. By the way, it should be about 7 cm below the level of the drain, as there will be several more layers on top. From what they will be made, you will know very soon.
So, while your screed dries, do not waste time. Consider what should be the side for the pallet and whether you need a step under the seat. All this can be done also from bricks, and ultimately to finish with a ceramic tile.
Finishing work
When the screed and the composition for the bricks dry out, you can carry out the primer with a special waterproofing compound. Now the design is almost ready. It remains only to impose its ceramic tiles. Choose it in accordance with the overall style of the room.
Shower tray ready. When everything is dry, you can try it into action.
As you can see, install the shower tray with your own hands in various ways. And it is not necessary to start with the purchase of this plumbing. However, it will be purchased or made by hand pallet, it depends on you.The main thing is to carry out all the installation procedures correctly, and then you will enjoy staying in the shower for a long time.
Video: how to install a shower tray


To send