The content of the article
It is long past times when only a classic set of vegetables and fruits were grown on the site. Today, anyone, even the most lazy gardener, wants to grow something on his window sill or in the garden. Exotic! And let's put kiwi? Tasty, useful, interesting, without hassle - what else is needed?
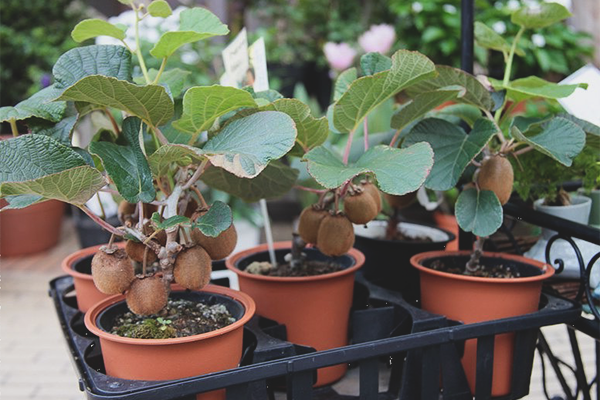
Of course, residents of the southern regions can do their "fi." They have a kiwi growing on almost every corner. But few people know that this vine can withstand temperatures down to -30 ° C. Or it is great to grow on the windowsill, in the greenhouse, winter garden. That is, residents of medium-sized regions can successfully grow a plant in themselves.
How to grow kiwi at home? It is not necessary to run around the flower shops, looking for a suitable sprout. This empty and useless exercise costs good money. Making it easier. We go to the market or to the store, and buy the fruit of kiwi.Pieces 7. We eat 6 of them. And one, the most ripe and beautiful fruit is left for seed. And it does not matter at all whether Kiwi has a down. You can grow at home from the seeds of "bald" berries. Yes, yes, from a botanical point of view, this is a berry.
But, we are not interested in it now. The classic way of growing kiwi from seeds at home includes the following important points:
- seed preparation
- germination
- growing seedlings
- landing on a permanent seat
- care issues
Well, as you can see from the list, everything is simple. There are no unimaginable moments or complex points. Let's sort each separately.
Seed preparation
You can not just pick out the seeds and stuff them into the ground. All this will safely rot and get thin compost instead of a beautiful vine. First, the seeds must be freed from the pulp. Making it with bare hands is not easy. There is an exit. Who ever collected his tomatoes for planting, he knows a very simple method of fermentation.
To do this, the mashed pulp is poured with a small amount of clean water and put in heat. After a day, a maximum of two mixtures will begin to ferment. In this case, all the flesh will remain at the bottom, and the seeds will emerge. Here they also should be collected.Spoon, strainer, piece of paper. Any convenient way.
Then they need to dry for about 2 hours. Everything, seeds are ready for the subsequent actions.
Germination
To be sure for the shoots, the seeds of kiwi must be germinated. This can be done in two ways: on a rag or in a "snail". Both options are equally good. The difference is only in the convenience of the subsequent transplant.
- On a rag. A cotton rag is put on a plate, a little hot water is poured. Spread the seeds, then cover with a transparent bag or plastic container. Placed in a warm place, air once a day. Days after 5 will appear tiny sprouts. If the seeds lie tightly, it will be inconvenient to divide them for transplanting. And if it is wide, then you will need a large area.
- In the "snail". A 10 cm wide strip of polyethylene is placed on the table. A strip of toilet paper is placed on top and slightly moistened with water. At a distance of 0.5 cm from the top spread kiwi seeds along the length of the entire workpiece. It is convenient to do with a wet toothpick. Then, starting from the edge, gently twist the resulting structure into a loose roll. This is called the "snail".
This wrapping is placed in a glass so that the seeds of kiwi are on top. At the bottom of the glass is poured 1.5-2 cm of pure water, then the reconciliation is closed with a transparent bag. The whole structure is placed in a warm place. When sprouts appear, it will be very convenient to plant them just by unfolding the “snail”.
Growing seedlings
After our kiwi seeds gave tiny sprouts, they should be planted. No, not outside. And not even in the pot. For this, the shoots are still too weak. We will plant them for the present in wide low capacity.
Ordinary land for planting is not suitable. It is too thick and oily. We need a loose, light and at the same time a little nutritious mixture. To do this, we take the soil, fine peat and clean sand. Mix all in equal proportions. Next, disinfect the resulting substrate, because the black leg does not sleep. It doesn’t matter to you whether you planted ordinary tomatoes or exotic kiwis. She will ruin everything. Therefore, a good solution is spilled with a solution of potassium permanganate of medium strength and calcined in the oven at 110 ° C.
Now we take the prepared container 10 cm high (washed with potassium permanganate and dried), we make drainage holes.Kiwi sprouts love to drink, but will not grow in the swamp. We pour a layer of prepared earth about 3 cm. Under the scheme 1.5 by 1.5 cm we make small holes. Depth is not more than 5 mm. And carefully lay out the peeled kiwi seeds. From above we fill no more than 2 mm of a soil mix. You can say - priprashivayom slightly.
Gently and without fanaticism sprinkle with clean warm water from a spray bottle, cover with glass. We put in a dark warm place. At night, we remove the glass so that cold condensate does not form, which can lead to diseases. In the morning we cover the container again. Instead of glass, you can use a plastic bag or a piece of transparent plastic.
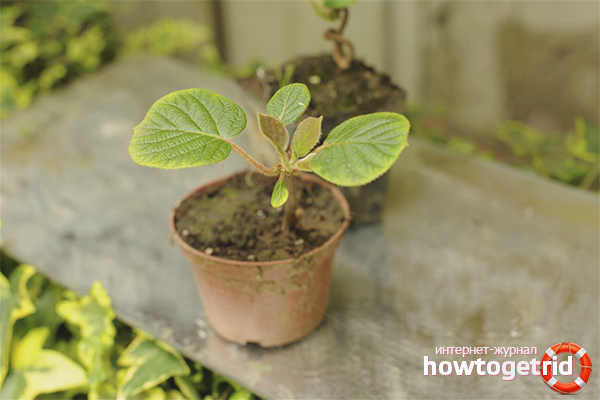
After the seeds of kiwi sprout, they need to be transplanted into more suitable containers. But not immediately, but only after the formation of a pair of true leaves. To delay with this is not worth it, because the kiwi very quickly develops a powerful root system. Slightly slow and then you have to tear tangled roots. And this will not benefit the plants. In addition, the leaves of kiwi themselves are wide and lush. There will be little space and light for them, so the shoots will be strong.
To avoid this, we plant a plant in a tank with a diameter of at least 10-12 cm. For two pieces, not more. We put on the lightest sill. This southern liana is very fond of light. If you can not provide good coverage from 7 am to 9 pm, then throw the idea - you are not a gardener at all! Plant swede, it does not require special care. And give a kiwi a fluorescent lamp or additional daylight illumination. This gardener has such lamps always.
All this time, strictly monitor the moisture content of the earth mixture. To allow the soil to dry out is strictly prohibited! Otherwise, why all these dances with sprouting and measuring the distance between plants, if you are going to kill them with drought? Better every day, a little bit spray the landing with a spray of clean lukewarm water. Moreover, Kiwi love to drink leaves. Of course, the shelter is removed. It is no longer needed.
Landing on a permanent place
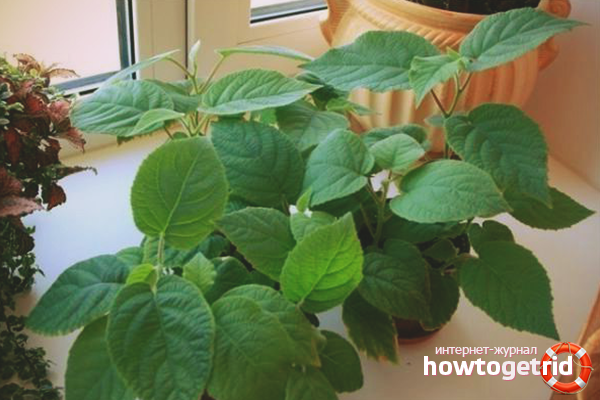
After the kiwi grow 3 pairs of true leaves, they need to be planted in a permanent place. On the street or in the pot. The soil should consist of fertile land and peat, 1 to 1.It is advisable to transplant kiwi by transshipment method in order not to affect the root system. That is, we take out a sprout from a container together with the earth, put it in a hole or a pot. Then we pour the soil from all sides so that the plant is firmly fixed and does not sway.
It is necessary to place kiwi on a well-lit place without drafts.
How to care for kiwi
Despite the exotic, care for kiwi is quite simple. Weeding from weeds, regular loosening. Be sure to monitor the soil moisture. In strong heat, kiwi well sprayed with clean water.
Feeding. From October to March, kiwis are fed with any available complex mineral fertilizer. About once every 12-14 days. Still, it is a vine, and for good growth it needs a lot of nutrients. Fertilizer solution is applied directly under the root of the wet ground.
Organics are fed from April to September, once a month. Carefully dig a groove around the perimeter, there lay a good compost or rotted manure. Only not fresh! Otherwise, burn the roots. After a few watering the plant will reach all the nutrients.
As for pests or diseases, they have not yet been found in the middle zone for kiwis, except ... cats. Yes, young plants of kiwi love to chew representatives of the cat family.Therefore, in the first three years it is better to put a fence. In the future, cats lose all interest in Kiwi.
Some tips
- Kiwi - dioecious plant. Therefore, one on the site or windowsill will not bear fruit. To learn whether it is male or female, it is possible only after flowering. By the way, it comes in the open ground for 3-4 year of growth, on the windowsill - only for 6 year. Male flowers are large, yellowish, they are usually very much. Female - snow-white, large with a big sticking out pestle. There are fewer plants.
- To get a consistently high yield of kiwi, plantings plan 4-5 women for one male plant. You can not wait for favors from bees or bumblebees and self-pollinate flowers.
- Pinch the crown of the shoots. So kiwi will grow in breadth, not length.
- For the winter, the kiwis are removed from the trellis (liana) and covered. Moreover, it is better not to put vines on the ground. Put a board or lapnik. Arcs are placed on top, then covered with three layers of greenhouse film. Between them, you can lay a single layer of dense non-woven material. In winter, it is advisable to cover the shelter with snow.
- With the onset of March, periodically open the film for a while.This is done to ensure that the vine is slightly cooled and does not go to growth ahead of time. After all, the March pranks are very treacherous: in the daytime the sun is warm, and at night frosts happen. Therefore, a little suspend the biological cycle of kiwi short-term ventilation.
- By the way, it happens that return frosts, even short ones, can completely destroy the entire above-ground part of an adult plant. Do not rush to uproot the roots. During the summer season, a completely independent plant will grow from them.
- Now available for sale are varieties that can winter without shelter, and withstand temperatures down to -28 ° C. Try to get a fruit or a sapling of this kind, and then you will not have to bother with a film or other shelter. By the way, the taste of these varieties at the height.
- Kiwi berries are harvested in late October or early November, before the real frosts come. Creepers have a very long cycle of growth and fruit loading. But they ripen perfectly in a warm room.
- In an unripe state, kiwis are perfectly stored until February in the simplest plastic bag.
- Those who grow vines on the windowsill, in the winter garden or a warmed balcony, you can absolutely not worry with the arrival of cold weather. And kiwi they ripen completely on the plant.The only thing you need to think about is good food for your pet and pollination of flowers. After all, there are no insects in the house that perform this function.
How to grow kiwi at home? It turns out very simple. Follow the recommendations above and every year you will enjoy yourself grown berries. Now, when the guests will gasp, having seen your plant, you can disregard it with words - yes this is kiwi, they found something to be surprised, it grows on my own.
Video: how to grow kiwi in the country


To send