The content of the article
Without painting the ceiling can not do any cosmetic repairs. For this purpose, water-based polymers are used. The quality of the appearance of the ceiling depends on the correct use of paint. Often beginning painters face the problem of divorce. They appear due to improper painting techniques.
This article will be useful to those who wish to learn how to avoid such problems. It describes in detail the rules and technique of painting, observing that you will be able to prevent the occurrence of divorces. But before proceeding to painting the ceiling, it is necessary to choose the right coloring composition.
The choice of water-based paint
Consumer market has a rich assortment of water-based paints of different composition and purpose.To avoid a mistake, carefully read the label on the can. It indicates the type of composition and method of application. There are four types of water-based paints:
- silicate;
- acrylic;
- silicone;
- latex.
In ordinary rooms, paints are used in the composition, which has latex and acrylic. They dry quickly, do not emit pungent odors, are resistant to wet cleaning with the use of chemicals.
In rooms where the level of humidity is high, paints based on silicone and silicate are used. For example, in the kitchen and bathroom. Due to its composition, a vapor-permeable layer is created on the surface that absorbs moisture and then slowly evaporates it.
Ceiling surface preparation
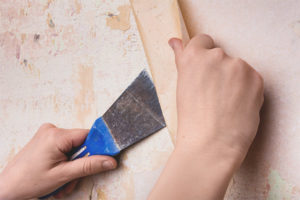
Before applying water-based paint, carefully prepare the ceiling. To do this, remove the old whitewash layer. If the ceiling has damaged areas, rub down the defects with a putty. Align the entire surface and prime at the end.
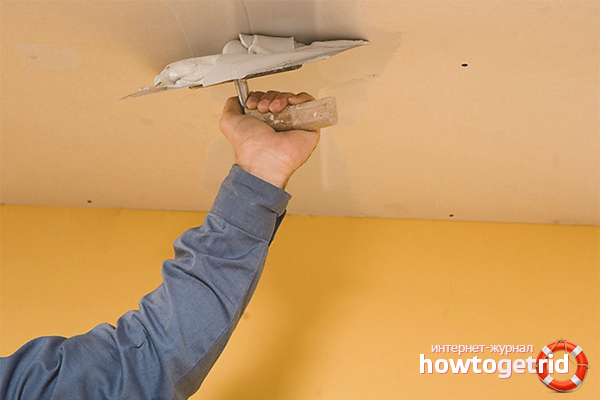
- Cleaning the ceiling. To remove the lime whitewash, wet the surface well. This is done with a water spray or a regular roller.For maximum effect, do this procedure twice at twenty-minute intervals. Lime absorbs water well, it will help to easily remove it from the surface. To scrape off whitewash, use a metal spatula. After cleaning, wash the ceiling with a sponge.
- Elimination of defects. Expand cracks or chips, expand and fill the finishing putty. Do this in small portions, trying to rub it in deep. Giving time to dry, rub the putty sandpaper.
- Surface alignment. By eliminating cracks and chips, you may have noticed that the ceiling has uneven patches. To fix this, use a thin layer putty. It has plasticity and adheres well to the surface. For applying putty, use a wide trowel. In areas with a large recess, make several layers. Achieve a perfectly flat surface throughout the ceiling.
- Primer ceiling. After leveling the ceiling, it must be primed. The primer fills the micropores, makes the plastered surface smooth, improves adhesion of water-based paint. Apply the primer in two layers with an interval of 15–20 minutes.
Required tools
To apply water-based paint to the surface without streaking, correctly select the tool. Pay special attention to this stage. For painting you will need the following tools:
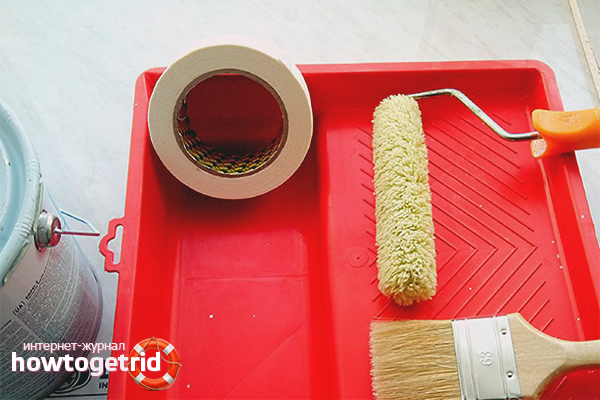
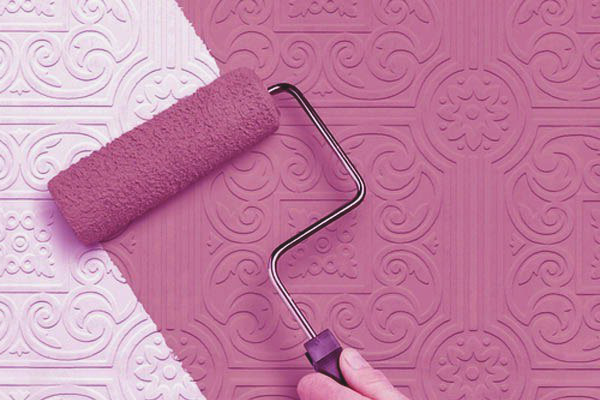
- The roller is the main tool in the paint business. It has a foam and fur surface. To paint the ceiling with a water emulsion, it is better to use rollers with a fur coat, which has an average pile length. Foam during rolling creates small air bubbles - this should not be allowed! A fur coat leaves behind a embossed mark that masks small scratches well.
- Brush - used for painting places that can not capture the roller. Ideal for spot work in areas close to the wall. To make this process convenient, it is better to use brushes with an average head size.
- The tray is a plastic tray with a small groove filled with paint. It is convenient to use it for dipping the roller.
- Construction mixer - used for dilution of paint.
- Polyethylene and masking tape - will help protect the walls and furniture from falling on them coloring solution.
- Protective equipment: work clothes, goggles, headgear and gloves.
If you plan to paint the ceiling in two or three shades, then for each color you need to use a new brush, roller and tray. Using the same tool for all the work, you mix the shades. The result is not the kind that was conceived.
Ceiling painting rules
Painting the ceiling with water-based paint, many make mistakes. There are nuances that are important to know. For example, it is necessary to take into account the rays of light or the sequence of painting sections. Following the rules, you can make the surface of the ceiling without streaks.
- Always start painting from the corners, and then the rest of the area.
- Apply several layers of water-based paint over a period of time.
- Give twelve hours to each layer to dry.
- After completing the work, cover the windows with a cloth so that the light does not hit the surface. The sun's rays can leave dark spots on the ceiling.
- Do not allow drafts to appear in the room until the aqueous emulsion coating dries out.
- Do not dry the ceiling with electrical devices.
The technology of applying water-based paint
There are several technologies for applying water-based paint. The choice of method depends on the conditions in which it will be used and the type of coating. In our case, it is necessary to make the surface without streaks. To paint for a long time pleased with their appearance, use the following tips regarding technology staining:
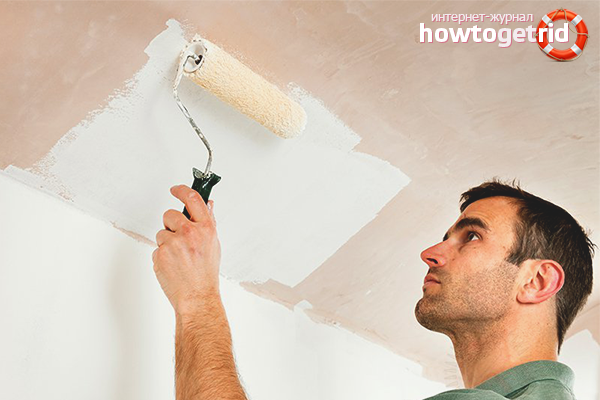
- Start painting from the corners and borders of the junction of the wall and ceiling. Determine the angle farthest from the entrance door. Dip the brush in the paint and walk it around the perimeter of the ceiling. The width of the line can be 5–10 cm. This is done in order not to touch the walls while working with a roller.
- After finishing work with the perimeter, proceed to painting the main area of the ceiling. Fill the latok with a water emulsion and dip the roller in it. Then, on white paper, roll well, so that the paint evenly soaks the pile and start painting the ceiling.
- Hold the roller at a 45 degree angle, making sure that it is not above your head.
- Apply the first layer in parallel, falling on the ceiling, the rays of light. Make the second pass perpendicular. The third layer should be applied in the same way as the first.
- Make parallel movements with an overlap of 5 cm.Keep track of the uniform application of the layer. Do not roll many times in one place - an influx is formed.
- To remove excess water-based emulsion from the ceiling, walk around the area with a dry roller without paint - his coat will absorb excess.
- Use a bright directional beam of light, such as a flashlight, to determine the quality of the surface.
- Apply the final layer with a new roller, this will help to achieve a uniform distribution of the coloring composition and prevent the appearance of stains.
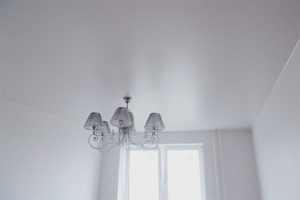
Aqueous paint is an affordable way to create a beautiful ceiling. In order for the quality of work to be at its best, practice and the observance of simple technology are needed. The result will be a surface that will delight its homogeneity.
Video: how to paint the ceiling quality


To send