The content of the article
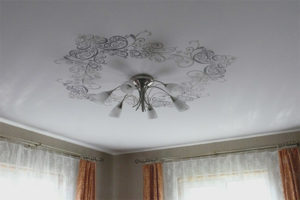
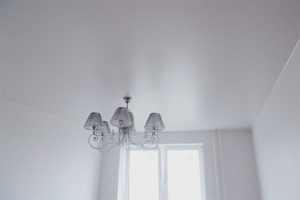
Beautifully decorated ceiling attracts visitors, makes the room interesting and unique. One way to achieve this effect is to use ceiling tiles. Using minimal means, it will turn out to quickly transform any room. But before you start to glue the tiles, you need to carefully prepare for this.
Ceiling surface preparation
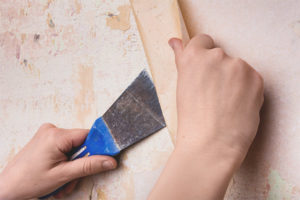
Preparing the surface of the ceiling will save you from the possible difficulties associated with the installation of tiles. To make the work quality, and the result is durable, follow these instructions:
- If the ceiling has an old whitewash, paint, cladding, plaster, which is frayed, wallpaper, etc.- remove, so that nothing would keep the tile from holding.
- After cleaning the surface of the ceiling, cracks, cavities, irregularities, etc. may appear. To correct defects, use a putty. It is ideal for leveling the ceiling, as well as for grouting damage of any complexity.
- When the putty is completely dry (after 12 hours), prime the ceiling. Apply several coats with a time interval for drying. The primer improves adhesion, and the tile is held tight.
In some cases, the ceiling is not cleaned from whitewashing, but immediately transferred to priming. So, do under one condition - the lime layer is in fairly good condition. This method does not guarantee a long-lasting result, but, as an option, a quick redecoration can be applied.
Determination of ceiling area
- The area of the ceiling is very easy to determine. To do this, measure its length and width, using a tape measure, and then multiply the resulting numbers. This method is applicable if the room is in the form of a flat rectangle.
- But there are rooms that have cut corners or L-shaped.To measure the area of a non-standard ceiling, draw a plan on a piece of paper, indicating the dimensions of all sides. Then divide the drawing into flat rectangular areas. Determine the area of each rectangle and add the data. As a result, you get the total area of the ceiling.
Example:
You made the necessary measurements of the ceiling and obtained the following data: width = 4 m, length = 5 m. Multiply these figures: 4x5 = 20 m2. Thus, the ceiling area is 20 m2.
Calculation of the amount of material
- To understand how much material you need to buy, first determine the area of one tile. This is done in the same way as in the case of the ceiling. Most tiles have a standard size - 50x50. Multiply this data: 0.50x0.50 = 0.25 m2. As a result, the area of one tile is 0.25 m2.
- Now you have the following data: 20 m2 - ceiling area and 0.25 m2 - tile area. Divide these numbers: 20 m2 / 0.25 m2 = 80 pcs. The result is that you need to buy 80 tiles for a room of 20 m2.
But do not rush to go to the store and buy just such a quantity of material. The fact is that during work errors can occur that lead to the breakdown of a certain number of tiles. Given the possible losses, buy material with a margin - 10% more.
Ceiling tile layout methods
There are many ways to lay tiles on the ceiling. For example, it is possible to arrange tiled squares in staggered or diagonal fashion, combining various colors, creating simple geometric shapes. There are lots of options, but any method requires accurate marking.
Most of the tiles are laid from the middle (the only exception is rooms with a small area where installation is carried out from the corners), therefore, first determine the central part of the ceiling. To do this, draw a diagonal with the help of threads. Then make perpendicular lines passing through the center. Such marking is universal and will help to arrange the tile by any convenient method.
The main methods of laying tiles:
- Diagonal. This option is often used and is suitable for any room. The drawn lines allow you to control tile laying in a diagonal direction. The result is smooth and beautiful.
- Chess order. To create the effect of the chess field used tiles of two colors. They begin to glue from the center point of the ceiling, so that the edges are parallel to the walls.The staggered tiles hide the imperfection of the ceiling surface well.
- Snake. In this embodiment, two combined or contrasting shades of the tile are used. Glue start from the center, creating a graphic image of a snake, twisted into a spiral. If you are unable to find a material of a suitable color, use water-based paint.
Ceiling tile installation rules
- You can not glue the tiles on whitewashing. This will cause the lime layers to peel off over time, and with them the tile. Before laying you need to clean the ceiling of chalk and primed.
- Glue tiles from the center of the ceiling or the location of the chandelier. It is necessary to control that the rows close to the walls have the same width.
- Buy tiles with a margin. For ceilings with projections of different heights, an additional amount of material is required. Also in the process of installation it is easy to damage or damage the tile.
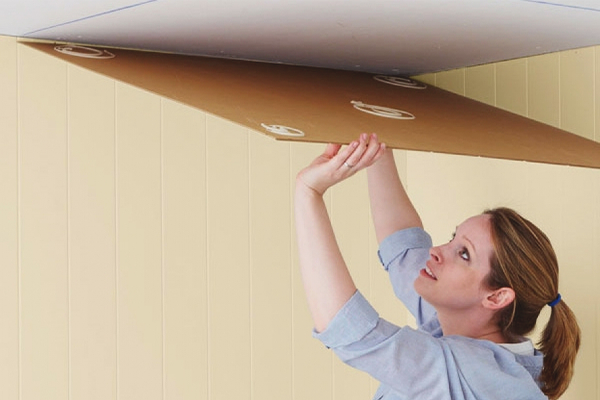
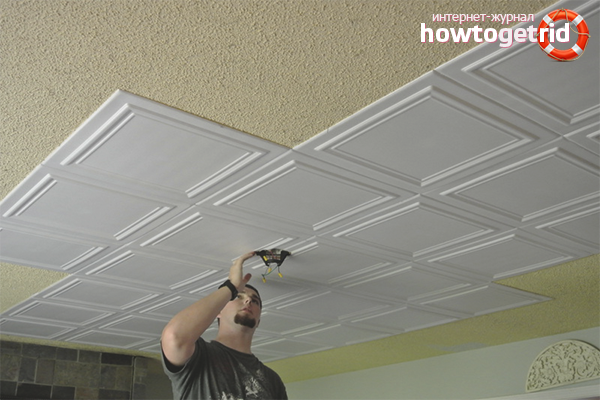
Tile installation
After painstaking preparation, a new stage of renovation begins - tile installation. From the correct work performed depends on the quality of the appearance of the ceiling.Follow the instructions below and you will succeed.
- Select a few tiles and carefully consider each. They should not have burrs at the edges. If such you see, cut, otherwise they will prevent to make the joints minimal.
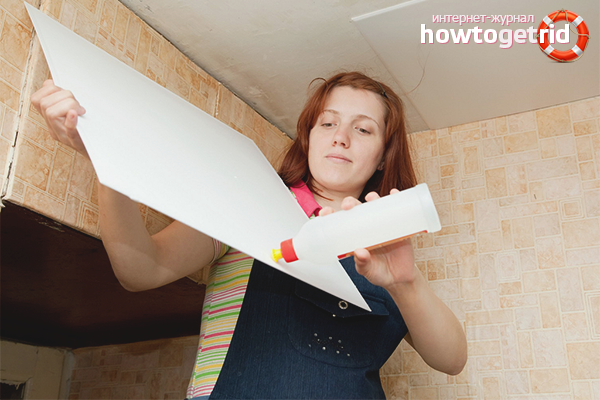
- Apply glue to the material. Spread it around the perimeter, departing from the edge of one centimeter, and also make a few strips in the center. Allow 1–2 minutes for the glue to thicken.
- Attach the first tile to the ceiling, aligning it diagonally and horizontally. Use a cloth to smooth for better bonding.
- Glue next tiles next in the same way, creating a central square.
- Focus on the laid tiles to stick the rest. Do not forget about the markup, periodically leveling the material.
- Approaching the edge of the ceiling, it is necessary to cut the tile. First do a fitting, and then cut. Try to cut, so that the gap between the edge of the tile and the wall was minimal. The plinth will then close it.
- After installation, allow the glue to dry well.
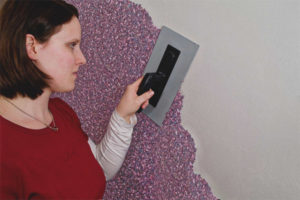
Putty seams
- While performing the work, it was possible that the seams could not be made with high quality.As a result, the ceiling between the joints of tiles peeps. To fix the deficiencies will turn out with the help of white sealant. It is sold in cans, and is supplied with a special elongated nozzle, through which it is easy to penetrate into the cracks. To work with sealant you will need a gun.
- All you need to do is gently squeeze out a uniform layer of white composition between the joints. Sealant closes the gaps, and at the same time strengthens the tiles on the ceiling.
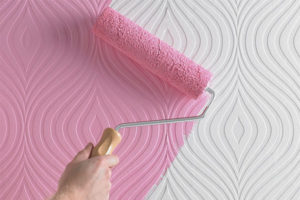
Painting ceiling tiles
- Having completed the correction of defects with stitches, you can leave everything as it is. But, if you want to decorate the surface, add it with various shades, then the most affordable way is to paint the tiles.
- As a coloring agent, you can use water-based compositions of acrylic or latex. They do not exude a strong odor and are resistant to wet cleaning. But first, prepare the surface of the tiles by applying a coat of primer.
- For painting it is better to use a roller with a foam surface. It will help to apply a uniform layer of paint. The principle of operation is the same as when coloring wallpaper.To keep the coloring composition well, apply at least two layers. Thus, it will turn out to make a unique geometric pattern that will surprise any visitor.
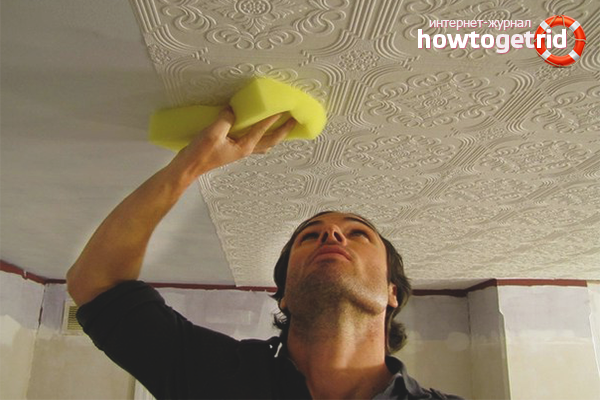
Ceiling tile maintenance
Any housewife knows that it is important not only to be able to glue the tiles beautifully, but to maintain it in proper condition. Tiled ceiling needs regular maintenance, it will extend the life, keep the original novelty.
During operation, dust gradually accumulates on the tiles. The result is a blackened surface that is unpleasant to watch. You can pour the neighbors on top, if you do not take timely action on the tile there will be rust spots that can not be removed.
To avoid all these problems and not re-glue tiles again, follow a few simple tips:
- Do a dry cleaning once a month using a vacuum cleaner or a bristled brush.
- Do a wet cleaning every two months, using a special mop.
- Do not use solutions that contain caustic substances. For cleaning it is safe to use detergents for dishes.
- Clean the areas with patterns with a sponge or a soft cloth soaked in solution.
After each wet cleaning on the surface of the tiles (especially in hard-to-reach cavities), moisture remains to be wiped off. It is convenient to use paper napkins for this. Wipe the surface and patterns thoroughly so that no wet stains are left.
Ceiling tiles are glued fairly easily, so everyone can do this task with minimal experience. The main thing is to prepare the surface well and correctly make the markup. The result is not to make yourself wait. You will have a room with a unique ceiling, which no one else has. Do not forget to support it, regularly cleaning from dust. And you can admire the result for many years!
Video: Tips for Ceiling Tile Stickers


To send