The content of the article
Potatoes in Russia decided to plant huge areas. Even in household plots, the lion’s share of land is under the authority of the “second bread”. And potatoes are considered unpretentious culture. Few people pay her due attention. After all, usually as they do? They hit the ground, threw down a tuber, once they grazed, tucked away, and in the fall they gathered. And what is collected? What has grown.

It is not accepted at our ceremony. If the quality is pumped up, then take quantity. How to grow a good potato crop? Good - this is not 100 buckets with 10 acres. This is 50-70 buckets with 1 weave.
Just do not say what is unreal. It is doable on their own. True, have to bow. But instead of 6 acres of land will be enough one. Plus, we will have to process a smaller area, so let's start.
What matters to a good potato harvest? Just a few components. The list is small, but each item is important:
- land preparation
- seed selection and preparation
- landing dates
- care and treatment
- harvest
Consider everything in detail and try to mention some tricks. All proportions will be considered in terms of 1 hundred square meters of land. That is, on 20 beds 5 meters long.
Land preparation
It is not enough to dig the soil before winter. Of course, the roots of the weeds will freeze, and some pests will die. But the potato is a mistress, she loves to eat. Therefore, pre-winter fertilization is a mandatory procedure.
Ideally, it should be manure, well-rotted. But now it is difficult and expensive to get it. So we are looking for alternative methods:
- Compost, humus. It will take a lot, up to 100 kg. Plus 2 buckets of the most ordinary ash. All this is scattered around the site and dug up.
- Green liquid fertilizer. It will take 50 liters. Also spill the soil, then dig.
- Siderata. Sowing in August, you can get a good harvest by the end of October. It is mown and tucked into the ground when digging.How many grams of seeds will be required per 1 hectare depends on the type of plant. Look at the package.
- Mineral fertilizers. Proportions per 1 hundred square meters: 20 tsp. urea, 100 st. l superphosphate, 20 tsp. potassium sulfate. Stir in a plastic container and evenly sprinkle over the area. Next dig up.
As you can see, you can choose the most appropriate option that suits your pocket personally, the degree of employment and ideology. Because some people do not recognize mineral water categorically, and someone does not want to mess with the sideratami.
In the spring, immediately after the melting of the snow, you need to dump the earth. This will break the upper crust and allow the weeds to actively grow. Until the landing of the potatoes, they can be cut or weed out. Thus, weeds will not interfere with shoots.
Fissures should be cut directly on the day of landing. It is recommended to shed the beds with copper sulphate or bordeaux liquid. This will be the initial protection against late blight. Potatoes are planted as usual with a spade. Or make a deep furrow, lay out the tubers, then sprinkled with earth.
Council Potato loves freedom, its root system is growing in width.Therefore, the most suitable landing pattern for it is 50 to 50 cm.
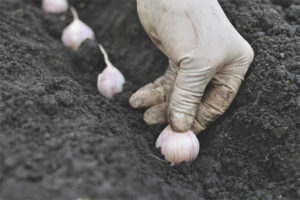
Selection and preparation of seeds
Of course, not seeds, but tubers. Aby what plant is not recommended. Because it will grow an unknown something. If you can praise your collection of varieties, congratulations. What to do to those who do not have it? Buy seed potatoes preferably in special stores. You can ask friends. If nothing happens, then we will work with what is available.
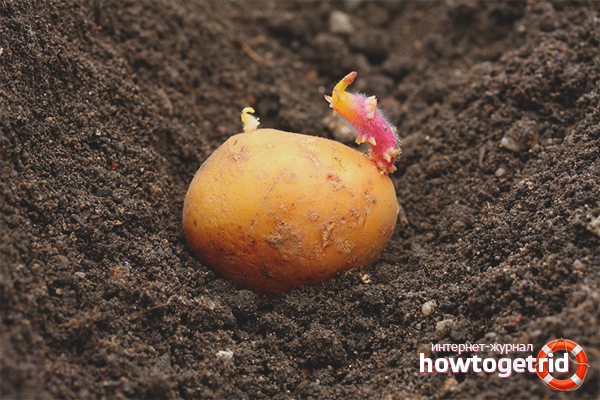
Pre-plant preparation begins well before the beginning of May. Potatoes need to be green and germinate. A month before planting, the tubers are laid out in one layer in wide boxes with wet sawdust. Before this, each potato is soaked in a strong solution of potassium permanganate for 20 minutes, then dried. Once a week, the tubers are sprayed with any biostimulant. Strictly monitor the humidity of sawdust. If necessary, sprayed with water. By the time of planting, the tubers will turn green, strong sprouts and a good root system will appear.
To activate germination, you can make a neat incision of the rind of the tuber to a depth of about 1 cm. Around the entire circumference, without touching the kidneys. Sections powder with dry ash.
If you occasionally got a good grade tuber, and you want to multiply it, then do not rush to shred it into pieces. Put the potato on sawdust, wait until the sprouts appear. Carefully break them off and plant them in the ground like seedlings. And the tuber will give new sprouts. So you can repeat two more times. If you did everything correctly, then at the time of landing you will have about 15-20 sprouts. They are planted in the same way as tomatoes. With proper care in the fall you get a good harvest of tubers, which can be left on the seeds.
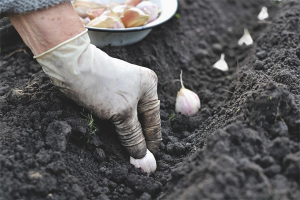
When planting in the hole, it is necessary to throw a zhmenka dry onion peel and a tablespoon of ash. Planted sprouted tubers sprouts strictly down! Do not worry, they are well aware in which direction they grow. But the underground part of the stem will be longer, which will allow more stolons to form. Accordingly, there will be more tubers.
Council Throw a small piece of dry orange peel into each well. This will temporarily confuse the pests. The aroma of citrus will scare them away.
Landing time
When to plant potatoes? Each region has its own dates.This is usually the time when the temperature of the soil reaches + 7-9 ° C. In order not to run with a thermometer in the corners of the site, you need to navigate through the nearby trees. Bird cherry blossomed, and the leaves on the birch blossomed? So it's about time, the Zemku is warm enough.
By the way, the optimal seed embedment depth is no more than 15 cm. Otherwise, you will have to wait for seedlings for a very long time. When the size of the tubers is slightly larger than a chicken egg per 1 hectare (20 five-meter beds), you will need only 5-6 buckets of planting material.
Care and treatment
Caring for potatoes is not so difficult. Of course, letting the growth of planting take place is not worth it, but excessive care will be unnecessary. Basic Postulates:
- Weeds Potato planting should be periodically loosened to complete closure of the tops. This should be done every 3 weeks. Along with loosening, sprouted weeds are cut. Cleaning them from the beds is not necessary. Let it remain as mulch.
- Disease. Every two weeks, the tops of potatoes need to be sprayed with a solution of phytosporin or Bordeaux mixture. Straight through the leaves. This is done to prevent disease planting late blight.
- Colorado beetle. The most important pest.Some sources recommend collecting beetles by hand. But this method only works if your neighbors do the same. Otherwise, you have to collect Colorado all season. And if hectares planted? How long will the pens be? Spraying potatoes with insecticides will still have to.
- Watering. Potatoes are absolutely not picky about regular watering. It is better to shed it well three times per season to a depth of 40 cm, than to sprinkle water over the top once a week. The first time watered after germination. The second - with the appearance of buds. The third - a week after the end of flowering.
- Feeding. Potatoes are grateful for any feedings. Nitrogen, mineral, green, on leaves or under a root. The main rule - fertilizer should be applied only after the appearance of buds. Then all the food will go to the tubers. If the lady is treated earlier, then there will be a lush thick tops instead of powerful tubers.
Council To temporarily confuse beetles, you can sow calendula or marigolds in between rows. Their strong flavor does not allow beetles to find potatoes. Just remember, you have to sow a lot of colors.
Harvest
Do not rush to dig potatoes ahead of time. It happens that the home, especially of an older age, literally eats a bald patch: “We must choose the potatoes faster, out, all the neighbors have already dug up”. Do not chase the neighbors. They have their own atmosphere. What is important to us is not only a good harvest of potatoes, but its further preservation. And so that the tubers are fully prepared for winter maturation, they must have a dense skin.
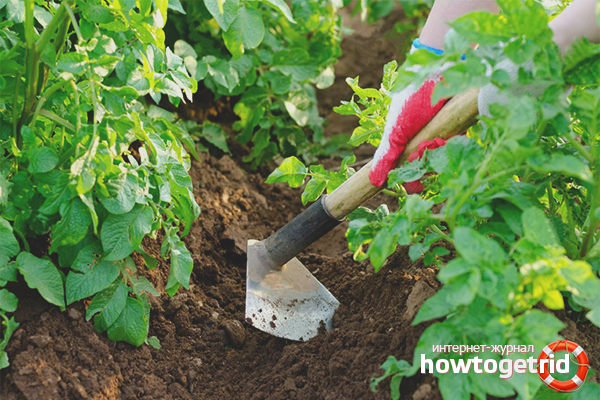
How to achieve this if all the deadlines have passed? What to do if the forecast promises cooling or rains, and the peel on a fresh potato is peeled off with a finger? First you need to mow the tops, leaving hemp about 10-12 cm. They are needed as a guide to know where to stick the forks when digging. Even if the tops are juicy and green, you have to get rid of it. It's a pity, but what to do. Thus, an artificial autumn is created for the tubers. No tops - no food - it's time to get ready for the winter.
And only 7-9 days after the procedure, you can begin to dig. During this time, the skin will thicken enough.
Most out of habit digging a shovel. It is much harder. Yes, and cut tubers get a lot. Try ordinary garden forks, you may not be able to refuse them. Do not be afraid that part of the tubers will remain in the hole. The earth is sufficiently compressed and will turn out in a whole lump.And then do not yawn, harvest.
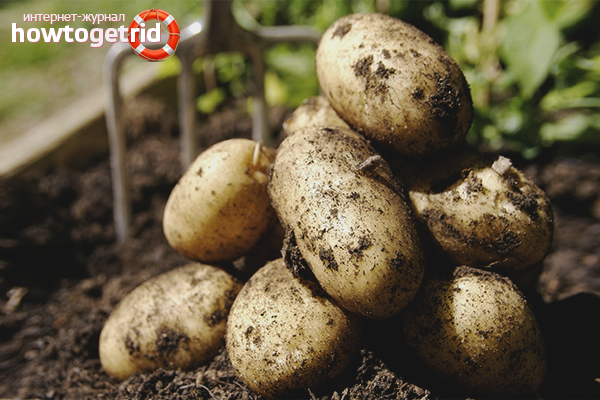
Do not rush to carry the tubers immediately to the cellar. Let lie in the sun for 3-4 hours. During this time, they dry well, and the sun's rays will kill most of the underground pathogenic bacteria.
Next, the potatoes should be placed in a dark barn for 5-7 days, without access of light. This is how most damage or disease will manifest. And only after that you can sort out the tubers. Those that are intended for seed, it is better to green in the light for about 2 weeks. This will allow them to grow faster in spring.
The rest of the harvest is stored in a dark cool cellar. In order not to hurt potatoes in the winter, the room is treated with whitewash or copper sulphate, then with sulfur checker. Enjoy the fruits of your hands, all.
Alternative hilling
Recently appeared alternative hilling method. It’s too early to talk about serious results. But the reviews about him are the most positive. The method is suitable for those who do not wish to wave hoe, spud planting or dragging a plow.
It lies in the fact that the ground is not raked from the sides of the bush, but poured directly into the center.That is, the stems are not collected in a heap, but on the contrary, are falling apart. At the same time it is not necessary to drag the soil in buckets. You can take a shovel or shovel from the row spacing.
Thus, the lower part of the stems is under the ground, as in the usual hilling. But, due to the fact that they are collapsed, there is more room for the growth of tubers. And the crop increases by 15-20%.
Someone will say, so throwing a soil with a shovel is harder than moving a chopper. And who said it was easy? In a different way - yes, but not much easier than the usual hilling.
Council To get started, try on several bushes. Suddenly you will not like the result?
Planting under mulch
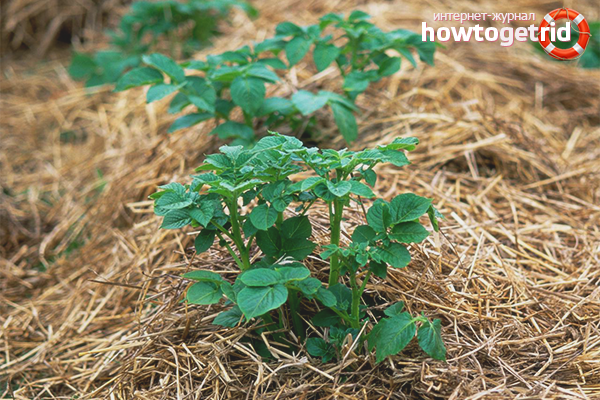
The method has already been tested and has both supporters and opponents. Its essence lies in the fact that the tuber is not buried in the soil, and left on the surface. By the way, you can even on the sward. But above impose a thick layer of mulch. As it declines and sags, they enclose new portions. In the fall, it remains only to scrape the grass to the side and collect clean tubers.
Advantages of the method:
- no need to spud
- yield due to direct contact with humus is 20% higher
- tubers are absolutely clean
- there is no danger of catching disease from the soil
Cons of the method:
- the mulch layer must be at least 50 cm, otherwise the entire crop will be green
- shrews and field mice also love potatoes
- if the mulch starts to mold, then all the potatoes will become moldy
- where to get so much grass?
Of course, this method is not suitable for planting large areas. Because the grass will have to carry stacks for the desired thickness. But you can try on several tubers. Surely, on the plot there is a free piece of land for the experiment.
Council With regard to fertilizing and pest control, with this method they are used in the same way as with the classical method of planting.
Landing in circular ridges
Another alternative landing method. Allows you to save on fertilizer and water for irrigation, but requires a little more space. The essence of the method is as follows:
- A circle with a diameter of 1 meter is marked on the ground. Prepared tubers are laid out on the circumference at a distance of 30 cm from each other, then sprinkled with a layer of soil of 10 cm.
- With a height of shoots of 9-12 cm bushes spud. Soil digging chopper from the center of the circle.
- The operation is carried out two more times.Gradually, it turns out a kind of bagel - in the center of the fossa, and around the mound with landings.
So you can be sure that all the nutrients go directly to the roots, and do not spread between the rows. The method is not bad, it increases the yield by almost a third. But very labor-intensive. After all, it will not be possible to just drive with plow to pile up the stems. We'll have to wave a hoe.
Useful and interesting facts
- If you uprooted old black currant bushes, try planting potatoes in this place. With little effort from 5 meters long 3 buckets of selected large tubers are gathered. True, only in the first year. Further yield decreases.
- The story is known, when they were already planting potatoes, when suddenly a heavy rainstorm with a large hail began. Accordingly, in the last 4 beds, a fair amount of water was poured into the holes and filled with hail. What a surprise it was in the autumn when cleaning! The tubers were large, clean and smooth. That is, watering directly into the hole at the time of planting significantly increases the yield. The method is time consuming if you plant the whole field. But you can try on several beds and compare the results.
- What to do if you want young potatoes, and you planted only varieties of the usual ripening period? No need to run to the neighbor and buy from her. You need to wear gloves and stomp on your garden. Neatly dig the soil at the side of the ridge. We find potatoes. Carefully tear off the largest ones. The rest fall asleep back and the next day do not forget to shed a bush and feed it. And we ourselves go to another and repeat the operation. So just you can taste the young potatoes, even if they planted only late ones.
- Do not plant the entire plot in one variety. What if this particular year turns out to be a crop failure for him, despite all your efforts? Better plant several types of potatoes and different ripening terms. So you will be sure that even under the most severe weather conditions, you will get your harvest.
How to grow a good potato crop? Observe agricultural practices, have good seeds and not be lazy. As they say in the people: as you sink, and burst.
Video: the secrets of growing potatoes

To send