The content of the article
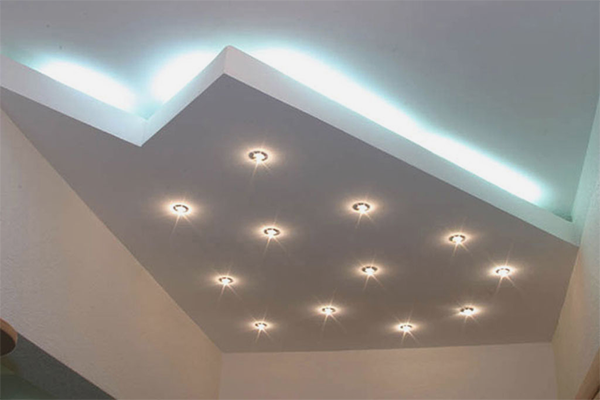
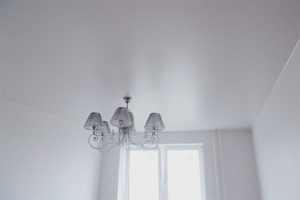
Modern suspended ceilings delight with the magnificence of shapes and shades, make the house more spacious and lighter. The unusual design is of great interest and makes a pleasant impression on visitors. New building technologies help to effectively use the ceiling space. As a result, each room turns out to be interesting and unique.
To date, the market offers an abundance of available materials for ceiling decoration. Experimenting with the form and color, you will manage to realize the most unusual design ideas. This article will help you with this. She will talk about the technology of installing a plasterboard suspended ceiling and teach you to understand the intricacies of work.
Preparing to install a suspended ceiling
Installing a suspended ceiling is technically hard work requiring preparation. Purchase building materials, collect the necessary tools. Everything must be prepared in order not to be interrupted in the process.
Necessary tools and materials
- drill with a set of drills;
- building level;
- hydro level;
- screwdriver;
- pliers;
- gon;
- hacksaw;
- hammer;
- roulette;
- marker;
- a knife.
Materials:
- drywall sheets;
- guide profiles;
- metal profiles;
- suspensions for the profile;
- metal screws;
- concrete anchors;
- brackets;
- dowels
Suspended ceiling installation
Suspended structures consist of a metal or wood frame on which sheets of drywall are mounted. Thanks to hinged technology, the ceiling is easy to give any shape. Overlaps are single-level and multi-level.
The first option is the simplest and fastest, its main task is to hide the irregularities of the old ceiling. The second option is more complex and time consuming, its purpose is not only to mask defects,but also perform a decorative function. Installation of any mounted structure follows the same pattern and is divided into several important stages.
Ceiling marking
At the first stage it is necessary to make a marking on the surface of the old floor. Mark the height of the future ceiling, as well as the location of the frame.
- Determine the lowest angle of the room. Measurements are made with the help of a tape measure, applying to the corners of the room. When the minimum level is found, make a mark on the wall, departing 5 cm from the ceiling. If you plan to install the lighting in the form of a built-in backlight, retreat 10 cm.
- Transfer the mark made to all other parties. Use the hydraulic level, it can be made from a thin hose. This is a handy tool, but you need an assistant to work with it.
- Now connect the marks on the wall. Use the dyeing cord, but if there is no such tool, take a long and level bar. On it draw horizontal lines around the perimeter.
- Attach the guides to the wall and make marks using a drill. The profile has ready holes for mounting. Drill a hole for dowels through them.
- Glue the sealing tape to the back of the guides. It is necessary to dampen vibrations, this will help prevent the appearance of cracks. Then dowel nails attach the profile to the wall.
- Make parallel lines on the ceiling for the longitudinal support bars. The standard drywall width is 120 cm, so the distance between the profile should be 60 cm. This will allow you to securely fix the sheet on the slats.
- Draw labels for suspensions. Mark points with a step of 50 cm on the lines of the ceiling profile. They are installed so that the construction of the profiles in the middle part of the ceiling does not sag.
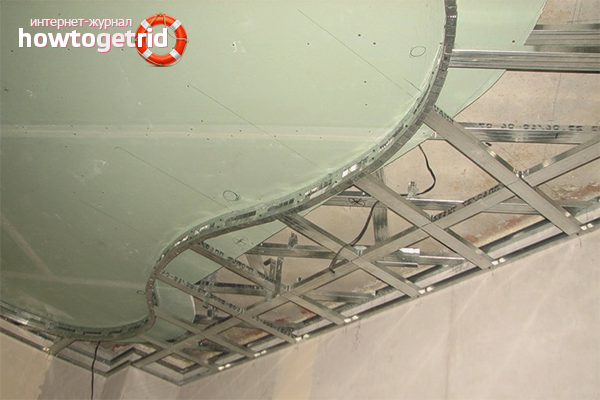
Frame Mounting
At this stage, set the metal frame. According to the marks made attach ceiling profile and suspensions. The work is carried out carefully, so that the basis is smooth.
- Insert the longitudinal strips into the groove of the guides. The distance between them should be 60 cm. The three-meter profile, if there is not enough length, attach one more bar to it and dock them with a special bracket. The total length of the longitudinal profile should be less than the length of the room by one centimeter.
- Attach the hangers to the ceiling along the profile in increments of 50 cm. The fixing is done with anchor bolts, which, unlike dowels, hold well and do not fall out of the holes.
- Begin to align the ceiling strips, for this is convenient to use the cord. Stretch it, tied to the most extreme profiles. On this cord you will make a single flat plane.
- Fix the profiles on the suspensions with metal screws. Bend the extra lengths outward.
- Attach the transverse pieces of the profile to the longitudinal strips with a step of 60 cm. For the tie, use the crabs brackets, which are installed at the marked places. Secure the transverse profile with tongues protruding from the crab.
- Fold the flags of the bracket in the direction of the slats and twist the small screws into them. At this stage, the installation of the profile ends. Now the frame is ready and you can proceed to the laying of electrical wires.
Wiring installation
After completing the installation of the hinged frame, begin to conduct electrical cables. It is recommended to make an external gasket. To prevent accidental ignition of the ceiling, all wiring should be protected by a metal box or corrugation.
- Mark the future cable route. It should pass along the wall from the switch with access to the ceiling for access to the lamps.
- Install the boxes on the markup. If you lay the wires in the corrugation, then use fasteners as fasteners.
- Lay the cable in the box or tighten it in the corrugation, and then fasten it on the clips. Each line must have a separate box or corrugation.
- When leading the cable to the location of the luminaires, leave a margin of 15 cm for each wire.
Drywall installation
After finishing work with wiring, install drywall. Installation of the first sheet start from the corner. It is necessary to leave a gap between the wall and drywall of 2–3 mm. The next sheet is set with an offset - in checker order. Drywall is fixed by screws on the metal in increments of 15–20 cm. The depth of entry of the cap should not exceed one millimeter.
- Layout sheets of drywall. On its surface, draw lines repeating the location of the profile. It is convenient to twist the screws on these marks. It is also necessary to make a drawing of the location of lamps.
- Chamfer the edges of the sheet - they must be beveled. This is done so that the plaster penetrates well into the gap at the junction of drywall.
- Screw the sheets to the profile. For convenience, you can use home-made T-shaped struts that will hold drywall. Use self-tapping screws to scroll through all the cells in the profile.
Creating holes for lamps
After sheeting the hinged profile with sheets, check the accuracy of the location of the marked holes. Deviations could appear in the drawing, correct them. If everything is in accordance with the design plan, proceed with the creation of the holes.
- Choose a suitable hole saw for the drill. The diameter of the nozzle should be equal to the diameter of the holes.
- Put on your glasses so that the gypsum dust does not get into your eyes.
- Make holes in the drywall, being careful not to damage the sheet.
Putty seams
In the matter of puttying the ceiling there are a lot of nuances, in order to take them into account at this stage it is necessary to observe the technology. Smear the joints with special putty. These are especially durable compounds made for gypsum boards. Prepare the solution in small portions in order to have time to putty before setting.
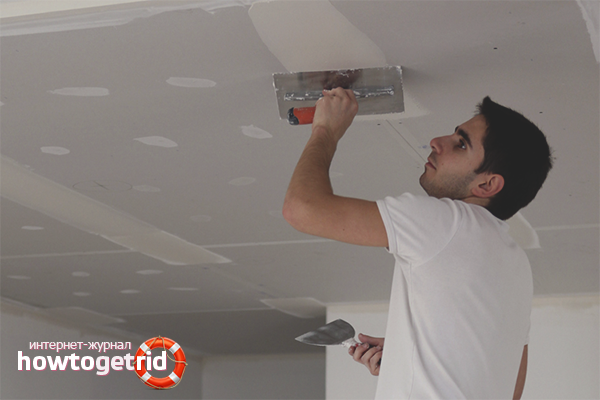
- After diluting the solution, begin to gloss over the seams.Make it a small amount of putty, otherwise the joint will be noticeable and uneven.
- After grouting, take a KURT paper tape and attach it to the seam. Press it with a trowel so that the tape does not crawl over the surface of the drywall.
- Rubbing large joints, try to make a wide layer. Excess can always be removed. The wider you squash, the smoother the surface will be.
- Applying the first layer to the entire junction, let the putty dry. It takes 10-12 hours.
- After drying, grind with a grinding grater all the places on which the putty has been applied. After grinding on the surface of the ceiling will be a lot of dust. To remove it, use a vacuum cleaner or a wide brush.
- Prime the entire ceiling. This is done because the base after the sealing of the seams has become non-uniform. Drywall and putty absorb moisture in different ways. Therefore, it is necessary to level the absorbency. To do this, use a primer.
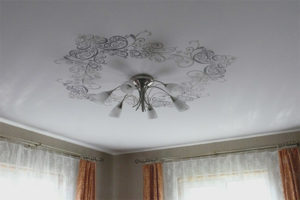
Ceiling putty
The ceiling is the most important place for repairs. It is always visible and must be perfect, without cracks and irregularities.At the ceiling with a quality surface with side lighting are not visible bumps.
To achieve the ideal, put the first layer of putty in one millimeter. This will help to remove all the irregularities of the ceiling. The second layer is applied fine putty on a vinyl base. It penetrates well into the micropores and makes the surface smooth.
Setting the backlight
After completion of the plaster remains to build spotlights. To do this, remove the wires from the drilled holes, rub over the ends and put on the terminals. Then connect to the lamp and insert it into place. It is securely fixed thanks to the spacer plates.
When creating a suspended plasterboard ceiling, each of the stages is important. This article describes in detail how to create a single-level overlap. Observing the basic rules and technologies, you will be able to make a wonderful and durable ceiling by yourself.
Video: installation of a two-level plasterboard ceiling


To send