The content of the article
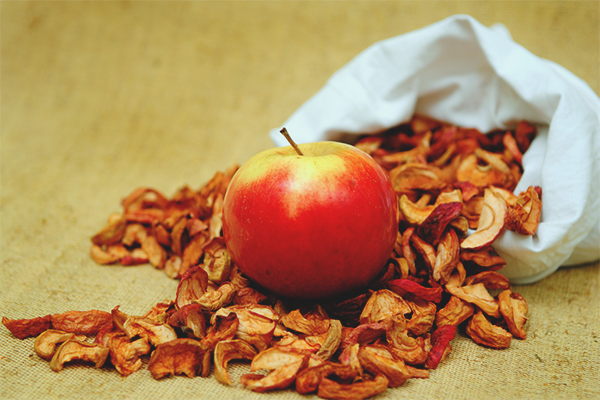
Dried apples are considered to be universal preparation. On the basis of this product, compotes and fruit drinks are cooked, and apples are also used as an independent dish. In addition, the harvesting retains useful properties not worse than fresh fruit. Many experienced housewives prefer to dry the apples on their own, not overpaying for store products. However, like any other matter, the procedure requires certain knowledge. Consider the basic aspects in order, we select the main methods of drying.
Features of drying apples
- If you dry whole fruits, sort them by size. It is also important to ensure that the surface is intact.
- The best option for drying are autumn apples.It is advisable to choose fruits with an equal degree of sweetness and sourness, you can use completely acidic varieties.
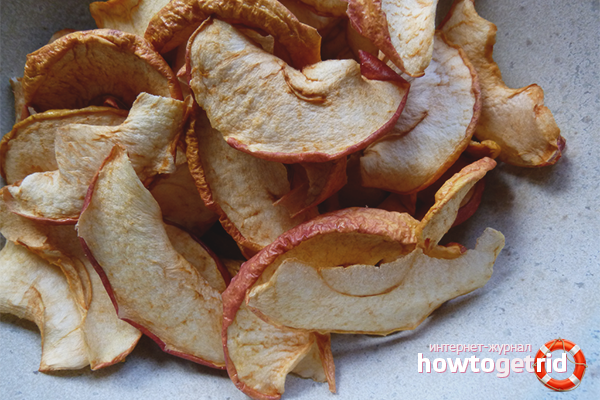
- If we talk about drying apples with slices, cut the fruit in such a way that the thickness of each slice is no more than 0.8 cm. It is important to adhere to a single indicator for all sliced apples.
- You can cut the apples into slices or slices, it all depends on personal wishes. However, the first option is preferable, since in this case the drying takes place quickly and evenly.
- In the process of heat treatment, all sliced fruits should be laid out in one row. Otherwise, the apples will dry out unevenly, some of the slices will burn and stick together.
Apples are getting dark: what to do
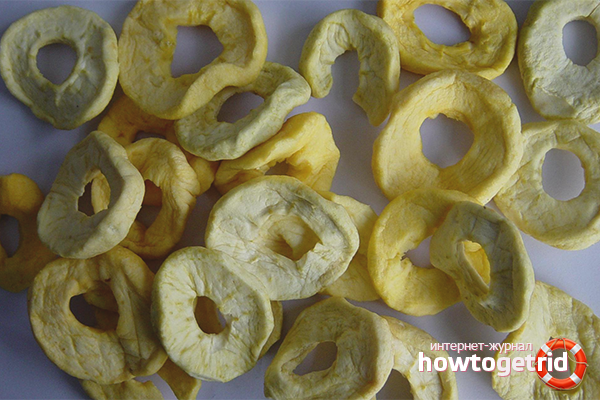
- Apples have an unpleasant feature to darken due to the large amount of iron in their composition. For this reason, oxidized fruits do not look aesthetically pleasing and lose a number of useful properties.
- Prepare a solution consisting of filtered cold water and fine salt. Dilute the amount with the expectation that 1 l. fluid accounts for 12 grams. bulk composition. Always stir the mixture until the granules dissolve.Soak the apples in the solution, soak for about half an hour. After that, dry and proceed to heat treatment.
- Another option that will save the fruit from blackening is the use of citric acid. Dilute 3 gr. composition in 1 liter. drinking water, mix until complete dissolution of the crystals. Dip the apple slices into the cold solution, wait 25 minutes. After this, remove and dry so that the glass has excess moisture.
- One of the most popular methods of eliminating darkening is the blanching procedure. The technique consists in the fact that the oxidized fruits are immersed in boiling water for 3 seconds, then extracted with a slotted spoon and dried. It is important to remember that in the process of blanching the apples become less sugary.
- Another common method is contrast processing. Place the circles or slices in a colander, hold over the hot steam for 5 minutes. After that, immerse in cold filtered water for 1 minute and remove. Drain on a pre-spread towel.
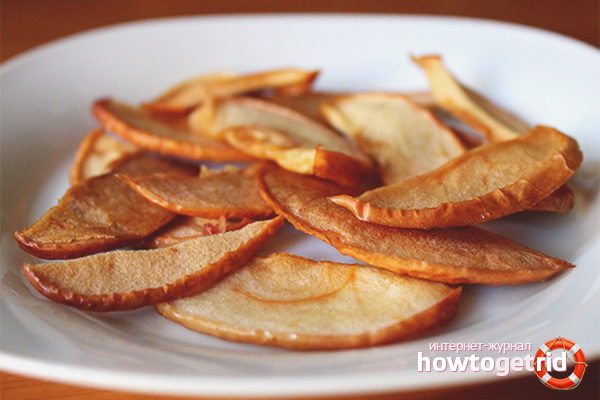
Drying apples in the oven
- For drying apples in the oven, winter varieties are considered the best option, while apples should be sweet, sour, or sour-sweet. Prefer Slavyanka, Aport, Titovka, Anis, Borovik, Antonovka.
- Some mistresses dry autumn or summer apples, as well as carrots through the oven. However, a lower quality product is obtained. In this case, the apples are dried directly with the peel.
- After selecting the varieties of apples proceed to their preparation. Go through the fruit, exclude all dented, rotten and stung pests. Send apples into a colander, rinse under cold running water.
- Remove the core in a convenient way (you can cut the fruit into 2 parts), remove the peel. Cut the apples into slices or slices about 8 mm wide. Send the cut to citric acid solution or salt to prevent oxidation.
- Remove the slices, optionally blister, if you want to get the final product faster. However, in this case, the apples will lose useful qualities. When the preparation is complete, proceed to drying.
- Take a few trays, cover the cavity with baking paper. Put the sliced apples in one row, keeping a distance of about 1 cm from each other. Turn on the oven to warm up, wait until the temperature reaches 85 degrees.
- Send the pans to the oven, after 20 minutes, reduce the power to 70 degrees. The process is started, wait 5 hours, then remove the trays and turn the slices upside down. Reduce the temperature by 20 degrees.
- In order for the apples to dry out well, and there is no mold on them, the curing time should be another 4 hours at 50 degrees. During this period, turn the slices every hour to dry evenly.
- When the crushed apples turn light brown, remove them from the oven. Take one slice, it should not be wet or brittle. Cool the apples, move them into a cloth bag or wrap in parchment paper.
Drying apples in the microwave
- Processing apples using this method differs in the speed of the procedure, which is considered to be an undeniable advantage. The final product is not worse than in the oven. At the same time, apples retain useful properties, they can be used as an independent snack or to prepare compote based on dried fruits.
- The main condition is considered to be properly selected power,thanks to which the product does not dry out. Equally important is the duration of heat treatment, it should not exceed the permissible limits. Drying is carried out in two stages, we consider each of them in more detail.
- To start, wash, sort through the apples. Remove the stalk, pith, peel. Choose a flat dish, you can use a round microwave dish. Cut the fruit into slices about 0.5 cm wide, soak them in a solution of citric acid and dry.
- Spread the apples on the dish in one row, put the container in the microwave, set the power to about 270W and the processing time of 35 seconds. After the expiration date, remove the dish, the apples will reach half-ready. Turn the slices over the other side, add power up to 300W, turn on the timer for 3.5 minutes.
- After the specified time has elapsed, remove the finished product, evaluate the structure. If the apples seem damp to you, set them for another half a minute. Next cool the dried fruit, send them for long-term storage in a tissue bag.
Drying apples in an electric dryer
- This method is considered to be the most convenient.The process does not require careful monitoring from the side, drying is automatic.
- To begin the procedure, sort through the apples, remove the rotten and spoiled. Wash the fruit, cut the core, the stalk and remove the peel (you can not remove).
- Large apples should be dried only in crushed form. To do this, chop them into slices or slices, place in a cold solution of citric acid for 10 minutes.
- The best option for drying apples in this way is Titovka, Antonovka, Pepin or Aport. Do not send for processing fruits ripened in winter. You can use a dicky or holistic apples.
- Collect the electric dryer, remove the section for apples from it, turn on the device in the network. Place the apples in one layer on the tray, insert it into the dryer, close the lid. Turn on the machine, go to do household chores.
- As a rule, the duration of heat treatment is 5.5-6.5 hours. In the first 3 hours, apples should be dried at a temperature of 80 degrees, then the figure is reduced to 50 degrees.
- To determine the readiness of the product, take a slice and push it.If the juice does not stand out, the drying is over. Cool the apples, put them in a bag or wrap with parchment paper.
Drying apples in a natural way
- The technique is good in that due to natural drying, energy costs are significantly saved. However, apples can be processed in this way only in sunny weather with low humidity, otherwise they will become moldy.
- For drying fruits in a similar way it is better to choose summer or autumn apples, a wild game will do. If the processing naturally went wrong according to the plan (it started to rain or the sun disappeared), you can dry the apples in the oven or with an electric dryer.
- Cut apples with a thickness of about 5 mm., No more. Otherwise the slices will not dry out completely. Soak the composition in a solution of salt or citric acid, remove and dry. Prepare a grill or plastic tray, lay them in one row, cover with gauze cloth.
- Send trays to the sun, at the time of darkness, remove the apples from the street. Keep them indoors until the morning, because at night the humidity is much higher than during the day. Drying apples in this way takes about 5 days.At the same time in daylight they need to be put on the street, and in the dark - to clean up home.
- After the specified time, you can dry the fruits in the oven or leave them in a place with good air circulation until the final preparation. Optionally, you can string the circles on a rope, dividing the apples together in a convenient way.
- After cooking, move the finished apples into a glossy bag or gauze folded in 6 layers. Keep in a well-ventilated place, do not allow moisture. Periodically open the bag to check the safety of the fruit.
Drying apples on the stove
- The technique is not considered the most convenient to implement. It is suitable for people who do not have a dryer / oven or it is not possible to get the finished product in a natural way.
- To start, sort out the apples, peel them from the peel and the core, chop them into slices (about 5 mm wide). Spread the food on the grill, put the section on a baking sheet.
- Place a baking sheet (or other metal dish) on the burner, set the minimum power. Dry for about 15 hours, periodically turning off the device.
- Turn the apples once every 3 hours. Optionally, you can combine natural drying with the use of electric stoves. When the fruits are dry, pack them in sacks.
The most convenient way of drying apples is considered heat treatment in the oven. If you have an electric dryer, the procedure will take place without external control. Many prefer to leave the fruit in the sun until the final preparation, it all depends on personal preference.
Video: drying apples in the oven

To send